Design Software Brands
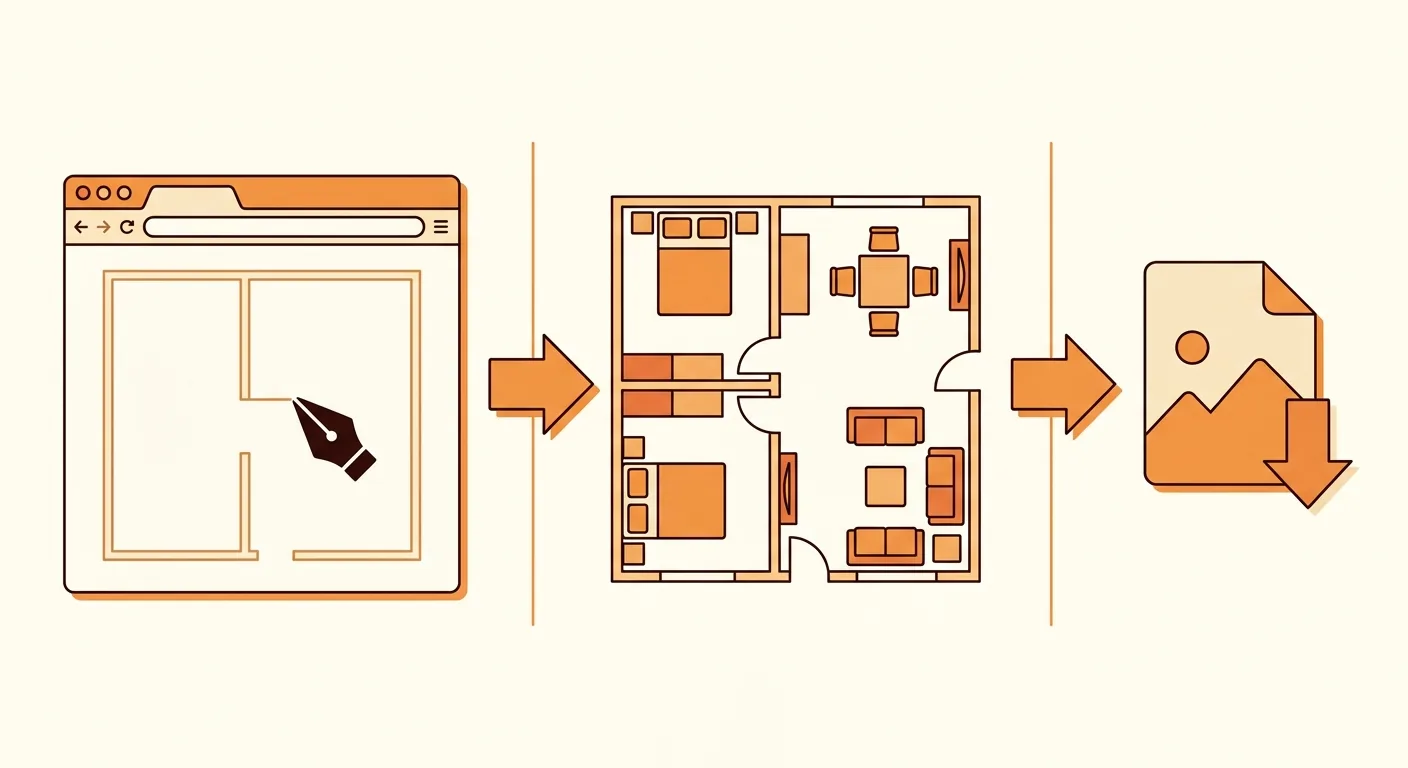
Want to draw a floor plan without installing any software? Floorplanner runs right in your browser — draw it, and export the file directly. That's exactly why so many people searching for an online floor-plan tool land on it.
This article walks through Floorplanner from start to finish: how to draw walls, place doors, windows, and furniture, export 2D/3D image files, and where Floorplanner Creator's advanced features and free-plan limits draw the line. By the end, you'll be able to produce a clean, presentation-ready floor plan. Want to see how it compares to other tools first? This comparison of 9 tools gives you the full picture.
Caption: The Floorplanner flow — draw walls in the browser → place doors, windows, and furniture → export a 2D/3D image file, no download required
Key takeaway: Floorplanner is a no-download, browser-based floor-plan tool with more than 30 million users worldwide and over 50 million design projects created (Floorplanner, 2025). It's built for quickly drawing a clean, exportable floor plan right in the browser, with a shallow learning curve for beginners.
Floorplanner is a no-download, browser-based online floor-plan tool used by more than 30 million people worldwide, with over 50 million design projects created on the platform (Floorplanner, 2025). Its positioning is clear: quickly draw a clean, exportable floor plan to hand to a contractor, designer, or client.
In our own hands-on testing, Floorplanner's biggest strength is that "you don't need to learn anything to start drawing." The interface is intuitive — drawing walls and placing furniture is all drag-and-drop — and you can draw a room in roughly ten minutes the first time you use it.
It takes the floor-plan route, focused on "drawing the layout clearly" rather than "computing a photorealistic rendering." You log in through your browser, open a new project, and start drawing — no download, no installation, and you can log in from a different computer and keep going right where you left off.
That's very friendly for anyone who doesn't want to install software on their computer. Compared to Sweet Home 3D, which requires downloading a desktop version, Floorplanner skips the installation step entirely — you open it and start drawing.
Floorplanner offers a free Basic plan you can use indefinitely, but it comes with usage limits. The free plan caps you at 5 saved projects at once, exported image resolution is capped at 960×540 with a watermark, and there's a 10-minute cooldown between exports (Floorplanner Free Plan Guide, 2026).
Paid access works on a credits system, purchased one-time or via subscription, used to upgrade project quality and remove the watermark. So whether it's worth paying comes down to whether you need a high-resolution, watermark-free export for formal use.
Floorplanner suits three types of users best: homeowners who want to quickly draw a floor plan to confirm the layout, people who need to export a clean plan for a contractor or client, and users who prefer cloud-based tools and don't want to be tied down by software installs and updates.
Who should skip it? If you need a photorealistic rendering good enough for a formal pitch, Floorplanner's 3D view is more illustrative than photorealistic — that's not its strength, and you should look at a tool like Homestyler instead. Getting the positioning right means you won't waste effort using the wrong tool for the job.
Many Taiwan users search for a "floor planner" tool specifically hoping for a localized interface. The good news is Floorplanner supports multiple languages, switchable in your account's language settings, and the drawing tool's operating logic is consistent worldwide (Floorplanner, 2025) — switching to your preferred language makes everything clearer to follow.
Once your language is set, the next step is drawing the room. This section walks through the most basic drawing process.
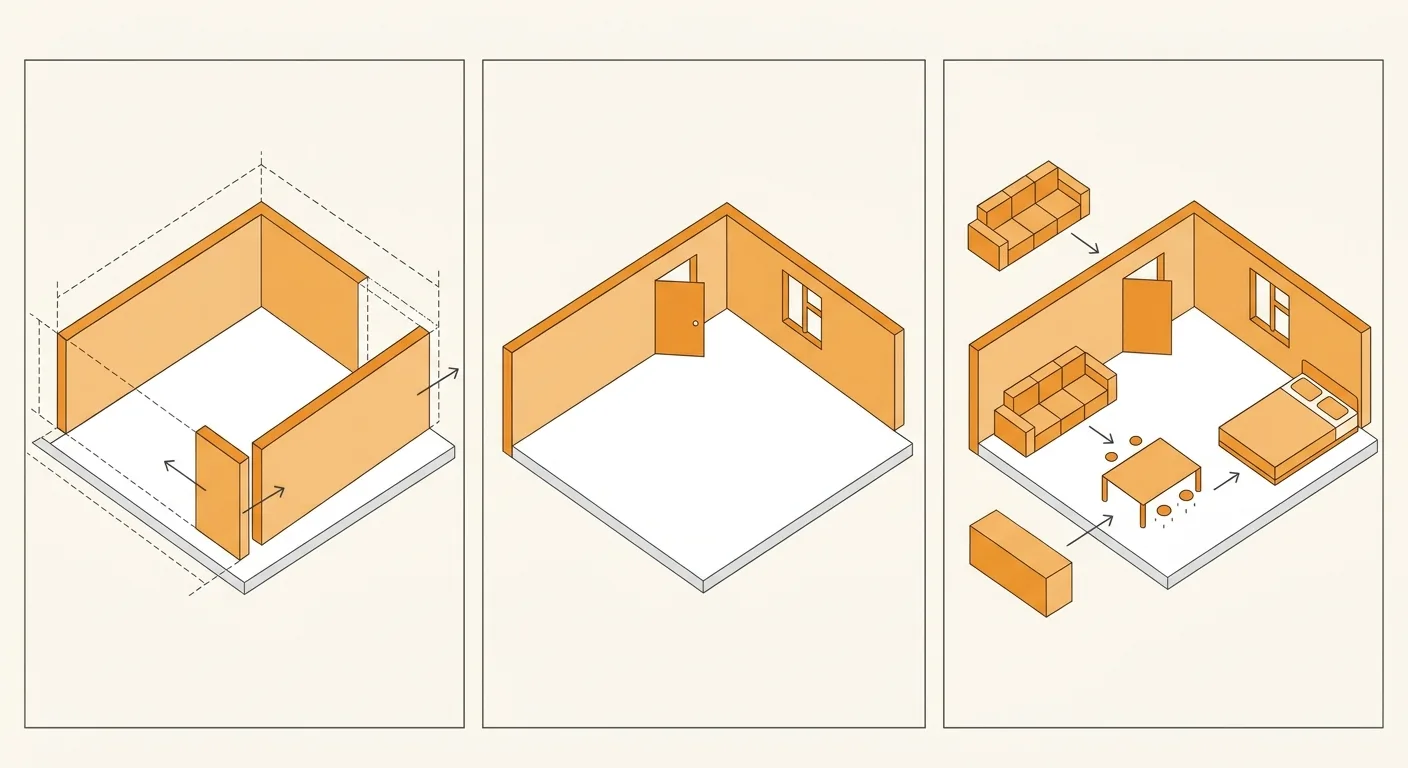
Caption: Three basic drawing actions (1) draw walls and set dimensions (2) place doors and windows (3) drag in furniture and add labels
After logging into Floorplanner, go to your account's personal settings to find the language option, select your preferred language, and save — the interface will switch immediately. A lot of people miss this step and end up stuck staring at an English menu for ages.
Once the language is set, the names of the main tools — drawing walls, furniture, exporting — all become much easier to understand. If you'll be reviewing the plan later with family members who aren't comfortable in English, this also saves you a lot of explaining.
Start a new project and use the wall-drawing tool to trace out the walls along your room's outline. Floorplanner shows the wall length in real time, and you can click on a wall to set it to a precise dimension. This step determines the accuracy of the plan, so wall lengths should always match what you actually measured.
When drawing walls, remember to snap the endpoints together and close the room outline so the floor generates properly. The first time we drew a plan, we missed closing one corner and the room wouldn't fill in — going back and connecting that endpoint fixed it right away.
Once the walls are drawn, drag doors and windows from the asset library onto the corresponding wall positions, then drag in furniture like sofas, tables, and beds. Every piece of furniture can be rotated and resized — the key here, again, is to resize each piece to match your actual furniture's real dimensions.
Once your furniture is placed, you can add dimension labels to make the floor plan more complete. That gives you a floor plan with both layout and dimensions — exactly the core skill people are searching for when they look up a Floorplanner tutorial.
Once the plan is drawn, Floorplanner lets you apply color and materials, switch between 2D and 3D, and export the file. Note the free plan's export limits: resolution capped at 960×540, watermarked, and a 10-minute cooldown between exports (Floorplanner Free Plan Guide, 2026). Knowing this line upfront saves you from discovering the image quality isn't enough only after exporting.
If you want a high-resolution, watermark-free formal export, you'll need to upgrade using credits. Here's the export process broken down.
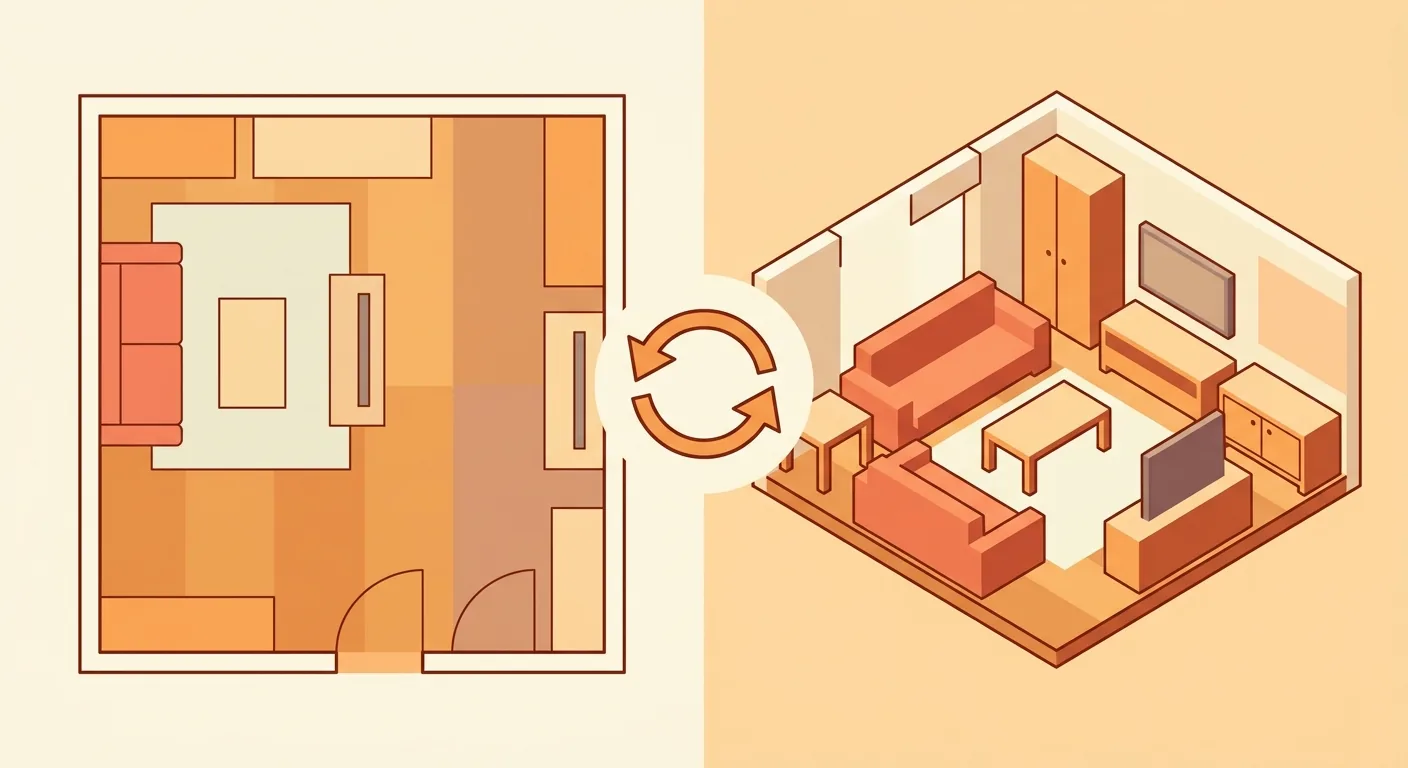
Caption: After coloring the plan and applying materials, switch instantly between 2D floor plan and 3D perspective, then export as a PNG/PDF image file
Once the floor plan is drawn, you can apply materials and colors to floors and walls to make the plan easier to read. Wood flooring, tile, and paint colors are all selectable, and adding them brings out an extra layer of depth immediately.
Coloring isn't just about looks — it helps communication too. A contractor reading a floor-material label understands more clearly than looking at a plain white base. This step doesn't take much time and is worth doing as a matter of course.
Floorplanner lets you switch between the 2D plan and 3D view with one click. Use 2D to confirm layout and dimensions, and 3D to quickly get a sense of the space. Its 3D view leans illustrative rather than photorealistic, but it's enough for a rough sense of the spatial feel.
If you want a truly photorealistic rendering, that's a rendering tool's job — see the Homestyler rendering tool for that. Floorplanner's strength always stays in the floor plan.
Once you're satisfied, you can export the floor plan or 3D view as a PNG or PDF. You can choose the resolution at export time, but the free plan caps it at 960×540 with a watermark (Floorplanner Free Plan Guide, 2026) — enough for your own reference, but you'll need to upgrade to remove the watermark and raise the resolution for formal delivery.
Our experience: use the free export for your own planning purposes; only spend credits on a high-resolution export when you actually need to print it for a client or a bid submission. Don't pay upfront just to get a rough sense of things.
Beyond individual accounts, Floorplanner also has a product line aimed at business and professional use. Paid access runs on a credits system, used to unlock high-resolution exports, remove watermarks, and access advanced features — and the platform's volume of over 50 million design projects (Floorplanner, 2025) reflects real commercial demand running on the platform too.
So when should you upgrade, and what exactly is Floorplanner Creator? This section explains.
Floorplanner Creator is its product line for business and professional drawing needs, differing from a regular free account by offering higher export quality, more project allowances, and advanced features. Real estate agents, furniture retailers, and event staging companies — industries that need to produce floor plans quickly and in volume — are its primary customers.
The average homeowner doesn't really need Creator's full capability. Figure out which type of user you are first so you don't pay for features you'll never use.
Advanced features typically include higher-resolution export, batch processing, watermark removal, and some plans even include white-labeling (rebranding as your own). These are useful for anyone "running a business off floor plans" — for example, a real estate agent putting a layout diagram on a listing page, or a furniture store arranging layouts for customers.
For individual users, these are mostly nice-to-haves rather than necessities. The question to ask is: will this image be used commercially? If yes, consider the advanced tier.
The decision is simple — check three things. Do you need a watermark-free, high-resolution export for formal use? Do you need to keep more than 5 projects saved at once? Are you using these images to pitch or generate revenue externally?
If any one of these three is "yes," it's worth evaluating a paid plan. If all are "no," the free Basic plan is enough. Confirm your actual needs before spending — that's the most cost-effective approach.
Floorplanner's strength is producing a beautiful, exportable floor plan — great for "drawing something to show people." But if your question is "does this arrangement actually leave enough room to walk through, and is the furniture spacing sufficient," what you need is a tool that automatically flags clearances. As DIY home renovation keeps growing, more and more homeowners are arranging furniture themselves — making this "will it actually fit" question increasingly common.
Roomfit exists precisely to answer that question. It's positioned differently from Floorplanner and complements it well.
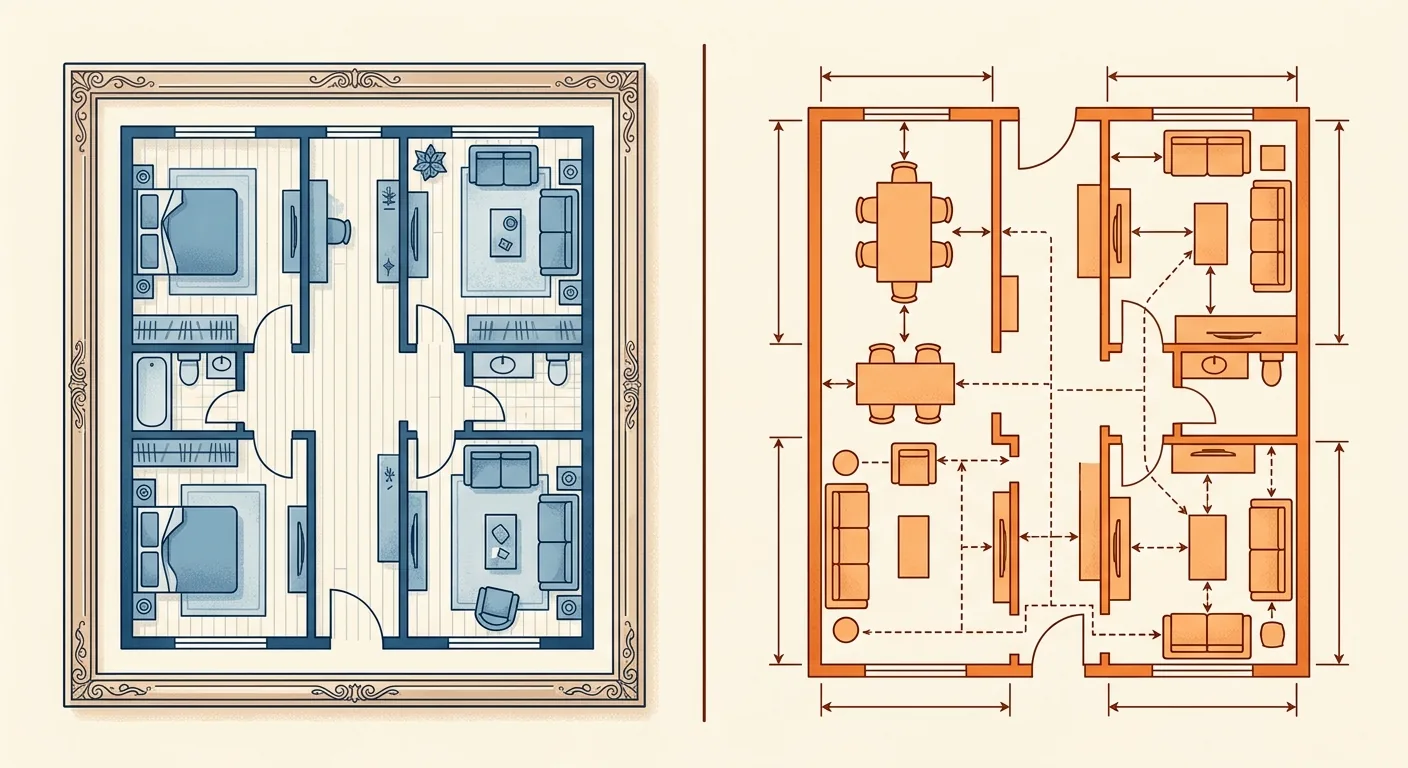
Caption: Floorplanner focuses on "drawing a beautiful floor plan," Roomfit focuses on "confirming it actually fits and you can walk through it" — different purposes, and they complement each other
Floorplanner nails "drawing a clean, attractive, exportable floor plan." Coloring, applying materials, switching to 3D, and exporting — the whole flow is smooth, and the result is presentable whether you're handing it to a client or a contractor.
It suits scenarios where "the plan is meant to be shown to someone else." If what you need is a deliverable, archivable, printable floor plan, Floorplanner does the job well.
Roomfit and Floorplanner have three objective differences.
The biggest difference is "automatic clearance labeling." With Floorplanner you have to label dimensions manually; with Roomfit, walkway sufficiency is calculated automatically as you arrange furniture.
The division of labor in one sentence: use Floorplanner when you need to deliver a beautiful floor plan; use Roomfit when you need to quickly verify whether things fit at true scale. The former focuses on "output," the latter on "verification."
Our recommended order: first use Roomfit to place furniture at true 1:1 scale and confirm the walkways work, then move into Floorplanner to draw it into a formal, polished floor plan for export. If you want to measure and record on-site at the same time, you can also pair this with Magicplan's phone scanning. Get the fit right first, then export — that's the order that avoids wasted effort.
Floorplanner is no-download and quick to pick up, used by more than 30 million people worldwide to draw floor plans (Floorplanner, 2025). Its localized interface, 2D/3D switching, image export, and Creator's advanced features each serve a purpose — the free Basic plan handles general planning, and you can upgrade when you need a formal high-resolution export.
But being able to produce a beautiful floor plan doesn't mean you've confirmed "this arrangement actually lets you walk through it." Walkway and furniture clearance usually need to be measured separately. If you want to skip manual dimension labeling and go straight to "does it fit," using Roomfit's true 1:1 scale with automatic clearance labeling gets you there faster; confirm it fits, then move into Floorplanner for the formal export — the two pair well together. Want to see the full tool landscape first? Go back to the Interior Design Software Overview.
Floorplanner offers a free Basic plan you can use indefinitely. The free plan lets you draw walls, place doors, windows, and furniture, switch between 2D/3D, and export image files, but it has usage limits: a maximum of 5 saved projects at once, exported resolution capped at 960×540 with a watermark, and a 10-minute cooldown between exports (Floorplanner Free Plan Guide, 2026). It's enough for general planning; you only need to pay for a high-quality, formal export.
Yes. Floorplanner supports multiple languages — after logging in, go to your account's personal settings, find the language option, select your preferred language and save, and the drawing tool's logic remains consistent worldwide (Floorplanner, 2025). Many Taiwan users search specifically for this step, and once switched, the tool names for drawing walls, furniture, and exporting all become much easier to follow.
Yes. Free Basic-plan exports are capped at 960×540 resolution and carry a watermark, with a 10-minute cooldown between exports (Floorplanner Free Plan Guide, 2026). That's fine for your own reference, but if you need to deliver to a client, submit a bid, or print, you'll need to use credits to upgrade to a watermark-free, high-resolution export.
Floorplanner Creator is its product line for business and professional use, offering higher export quality, more project allowances, and advanced features like batch processing and white-labeling. Its primary customers are industries like real estate, furniture retail, and event staging that need to produce floor plans in volume, and the platform's 50-million-plus project volume reflects that kind of demand (Floorplanner, 2025). The average homeowner can use the free plan and usually won't need Creator.
It's suitable for "layout communication" floor plans. Floorplanner takes the floor-plan route, with wall lengths and furniture dimensions matched to real-world scale, and you can label dimensions and export a file for a contractor's reference. However, formal construction drawings often follow stricter labeling standards, and Floorplanner leans more toward the planning and communication level. To confirm placement clearance and walkways, we recommend verifying at true 1:1 scale with Roomfit first, then exporting the formal floor plan.
Arrange furniture in your space at true 1:1 scale with Roomfit and see exactly how much walkway is left — no install, no sign-up.
Start with Roomfit →