Floor Plans & Layout
Want to sketch your own home's floor plan but not sure where to start?
Good news: drawing a floor plan isn't as hard as it seems. What's actually hard is "measuring accurately" and "keeping the scale consistent."
This guide walks you through starting with the right measuring tools and technique, comparing hand-drawing, Word, and dedicated tools, and gives you a step-by-step process a beginner can finish in 30 minutes. Finally, it shows you how to use Roomfit to pull walls and drag furniture directly on a 1:1 board, skipping the most time-consuming step — "manually calculating the scale" — entirely. If you want to understand the overall layout planning process first, pair this with our complete guide to reading floor plans.
Key takeaway: Drawing a floor plan comes down to three hurdles — measuring, setting the scale, and labeling dimensions — and accurate measuring is the foundation. The global floor plan software market was valued at roughly $7.2 billion in 2025 (Floor Plan Software Market Report, 2025), with more and more people switching to online tools to skip the manual scale math, letting a beginner draw a usable floor plan in 30 minutes.
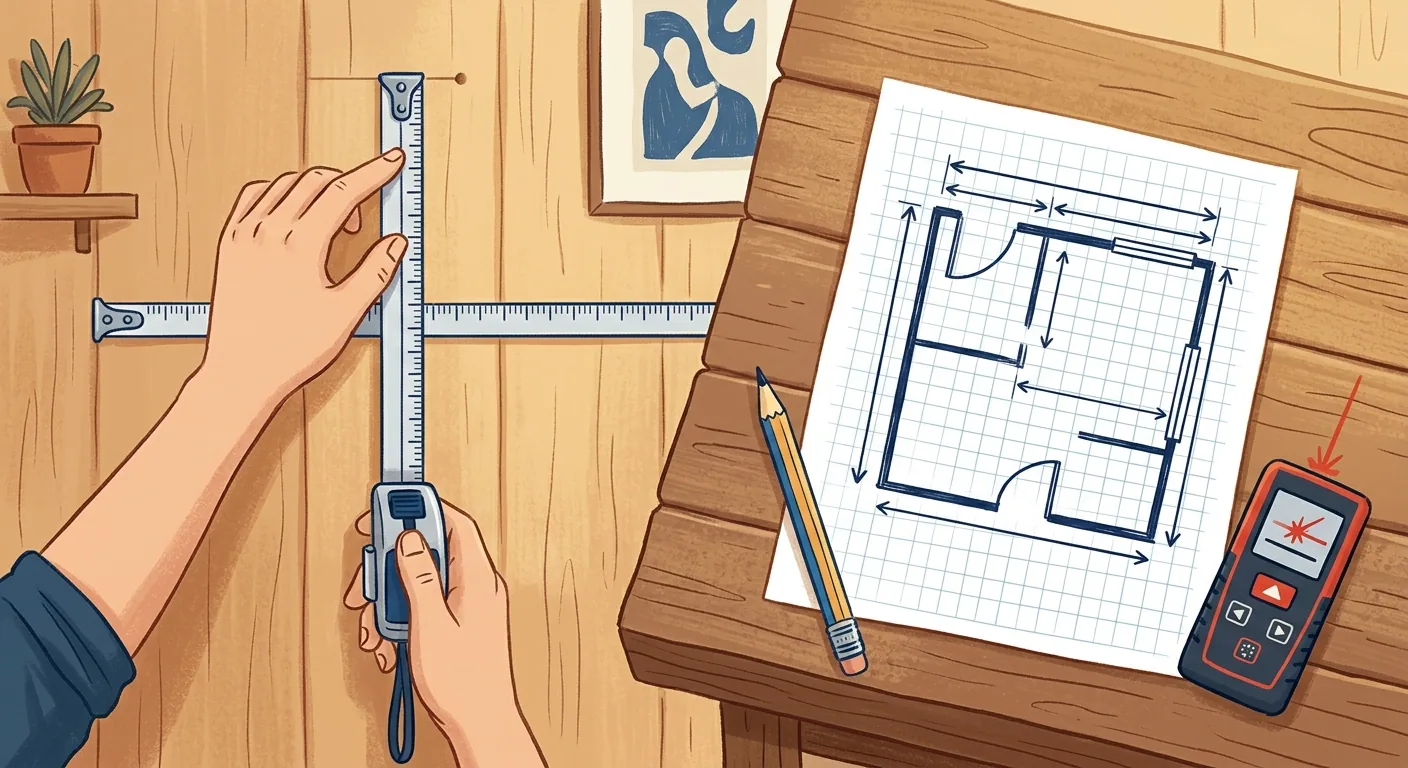
Before you draw, get the measuring right, because accurate measurement is the foundation for every step after it. Three tools are all you need: a tape measure or laser distance meter, a notebook or phone for notes, and optionally grid paper. Measure wrong, and no scale, however elegant, will save you. The average home in Taiwan is roughly 31.5 ping, about 104 m² (Ministry of the Interior Real Estate Information Platform, 2025) — not a lot of room to spare, and a 5 cm error on one wall segment will throw off where the furniture ends up in your drawing.
Measuring isn't just walking around the room once — there's a fixed method to it.
A laser distance meter is the least effort — point it at a wall, press a button, get a number — especially handy for long walls. Without one, a regular tape measure works perfectly well too, just get someone to help hold it for longer distances.
Grid paper isn't essential, but it's highly recommended — the grid itself is a ready-made scale reference, so drawing wall lines along the grid keeps the scale naturally consistent. A phone notes app is handy for quick photos and jotting down numbers, so you don't lose track later.
The correct technique is to "measure along each wall segment in sequence": start at one corner, measure the length of each segment as you go along the wall, and note a number whenever you hit a door, window, or corner. Measure the width of door and window openings too, along with their distance from the nearest corner.
Note beams, columns, and awkward corners as well — how far a column protrudes, which corner is angled — you'll need these later when drawing interior walls. Write the numbers directly onto the corresponding spot on your sketch, not all bunched together, or you won't be able to match them up later.
A floor plan is a top-down view, but there are a few heights you should measure while you're at it: ceiling height, window sill height, beam clearance, and which way each door opens.
When we've helped users rebuild a layout, "beam clearance" is the thing most commonly forgotten. A lot of people measure length and width and call it done, only to find after ordering the wardrobe that it hits a beam and can't reach the ceiling. Spending three extra minutes measuring heights can save you a costly return.
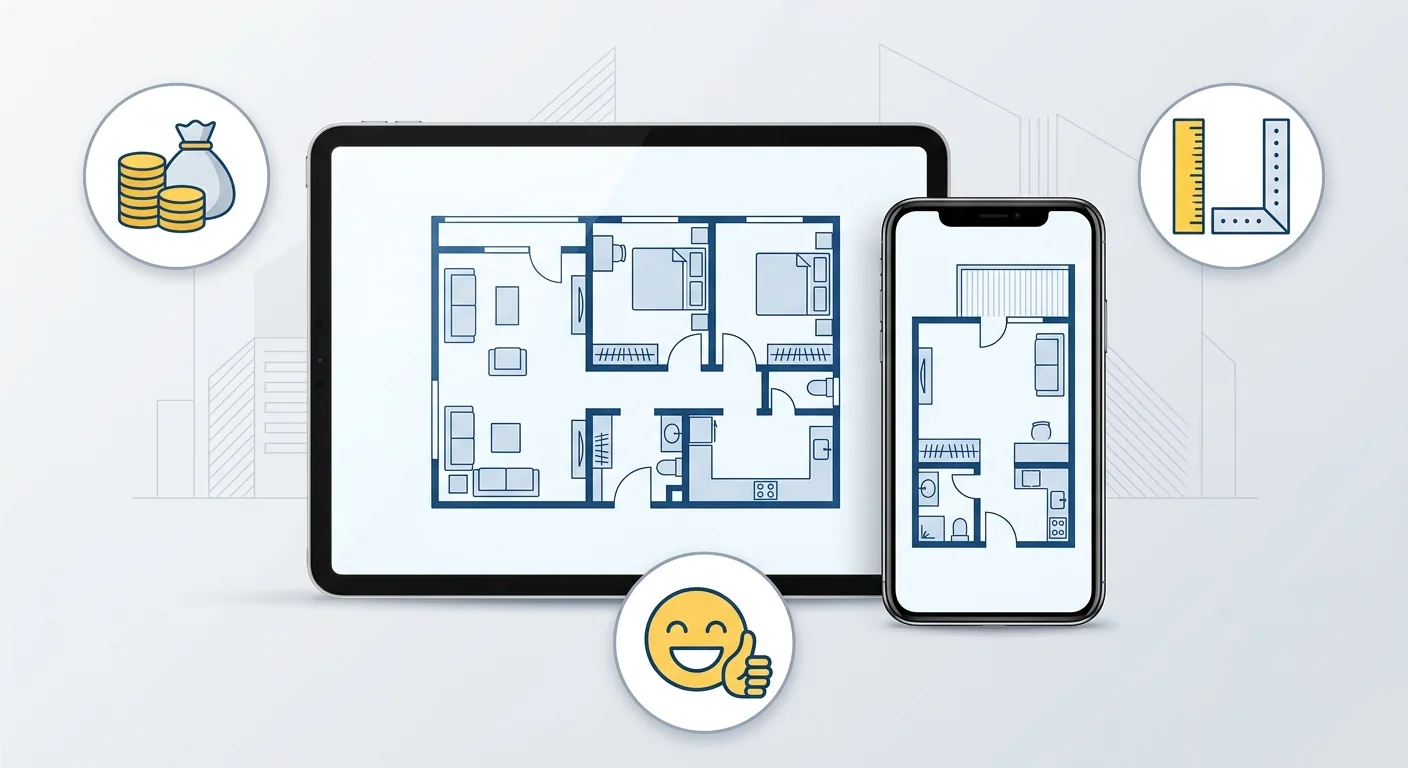
There are three routes to drawing a floor plan: by hand, cobbled together in Word or slides, or with a dedicated online tool. Hand-drawing has the lowest barrier but the scale is hard to keep precise; Word is something most people already have but wrestling the scale is a hassle; a dedicated tool is the least effort and most accurate, but takes some time to learn the interface. Which one to pick depends on how precise you need to be and who you're showing it to.
Let's lay out the pros and cons of all three.
Hand-drawing's biggest advantage is that you can start anywhere, anytime — grab a piece of paper on site and get going, great for quick notes and rough drafts. The downside is just as obvious: the scale is hard to keep precise, and any edit basically means redrawing the whole thing.
If you just want to jot down the rough layout and refine it later at home, hand-drawing is plenty. But if you're taking it to a contractor to discuss dimensions, the margin of error in a hand-drawn sketch gets a bit risky.
Drawing in Word or a slide deck is a common compromise. The method: use a table's grid cells as a scale, or use the "shapes" tool to pull out rectangles and assemble them into walls, drawing door, window, and furniture symbols yourself.
The upside is that most people already have it on their computer and can save and print. The downside is that pulling the scale right is time-consuming, and you have to draw every furniture symbol by hand — a complex layout will drive you to despair. This is also why a lot of people searching "draw floor plan in Word" eventually give up.
A dedicated online tool solves the two most annoying parts: the scale can be calibrated, and furniture symbols are built in. No manual math, no drawing your own sofa — just drag and it takes shape, and you can export it to show someone else.
The trade-off is that you need to spend some time getting familiar with the interface first. But once you've learned it, drawing the base plan for a studio or small home is far faster than hand-drawing or Word. To compare specific tools directly, see our simple floor plan app comparison.
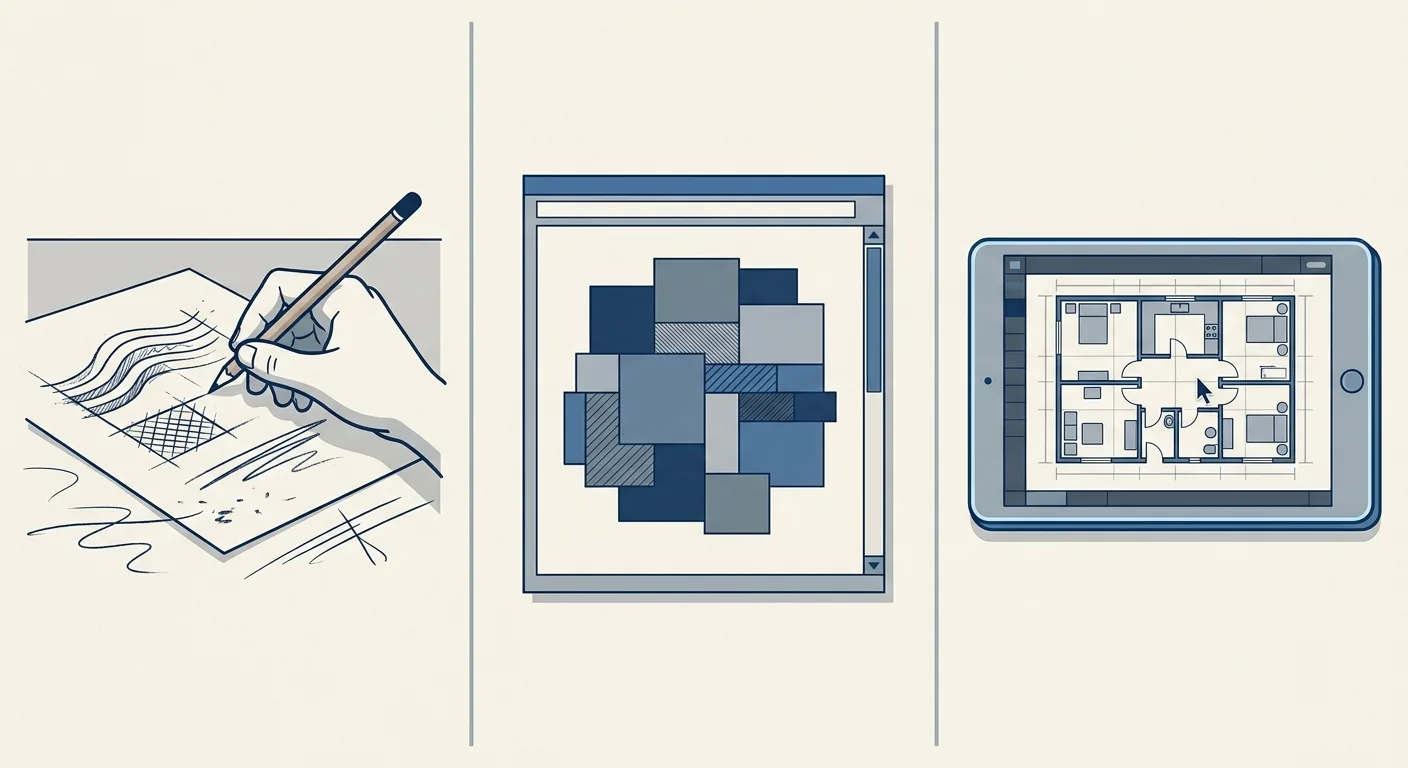
Caption: Each of the three methods has its trade-offs — hand-drawing is fastest, Word is a compromise, an online tool is the most accurate and least effort
Get the order right, and even a beginner can draw a usable base plan in 30 minutes. The steps: (1) set the scale using the longest wall you measured → (2) draw the exterior wall outline → (3) fill in interior wall partitions → (4) draw door and window openings and swing direction → (5) label the dimensions. The key is "one scale for the whole drawing" — don't draw one wall at 1/50 and another at 1/100. If you're unclear on scale conversion, see our illustrated guide to floor plan symbols and scale.
Once you're familiar with this process, a small home's base plan really can be finished within half an hour.
Decide "how many real centimeters does 1 cm on the drawing represent." Use your longest measured wall to figure this out: if the longest wall is 5 meters and you want to fit it on A4 paper, 1/50 (10 cm on the drawing) fits perfectly.
Once the scale is set, use it for the entire drawing — this is where beginners most often slip up. If you're using grid paper, just decide "one square equals how many centimeters" directly, and it'll be easier to keep aligned.
First draw the exterior wall outline at scale, establishing the overall frame of the unit. Then fill in interior walls and partitions based on your measured numbers, dividing up the rooms.
Next, draw the door and window openings: remember to draw the arc showing a door's swing direction, and show a window as a break in the wall. Don't draw the swing direction carelessly — it affects whether furniture can go against that wall.
Finally, label dimension numbers on every wall segment and opening, and clearly note the unit (cm or mm). Don't wrap up right after labeling — cross-check against the actual site once more and verify the door/window positions and a few major dimensions.
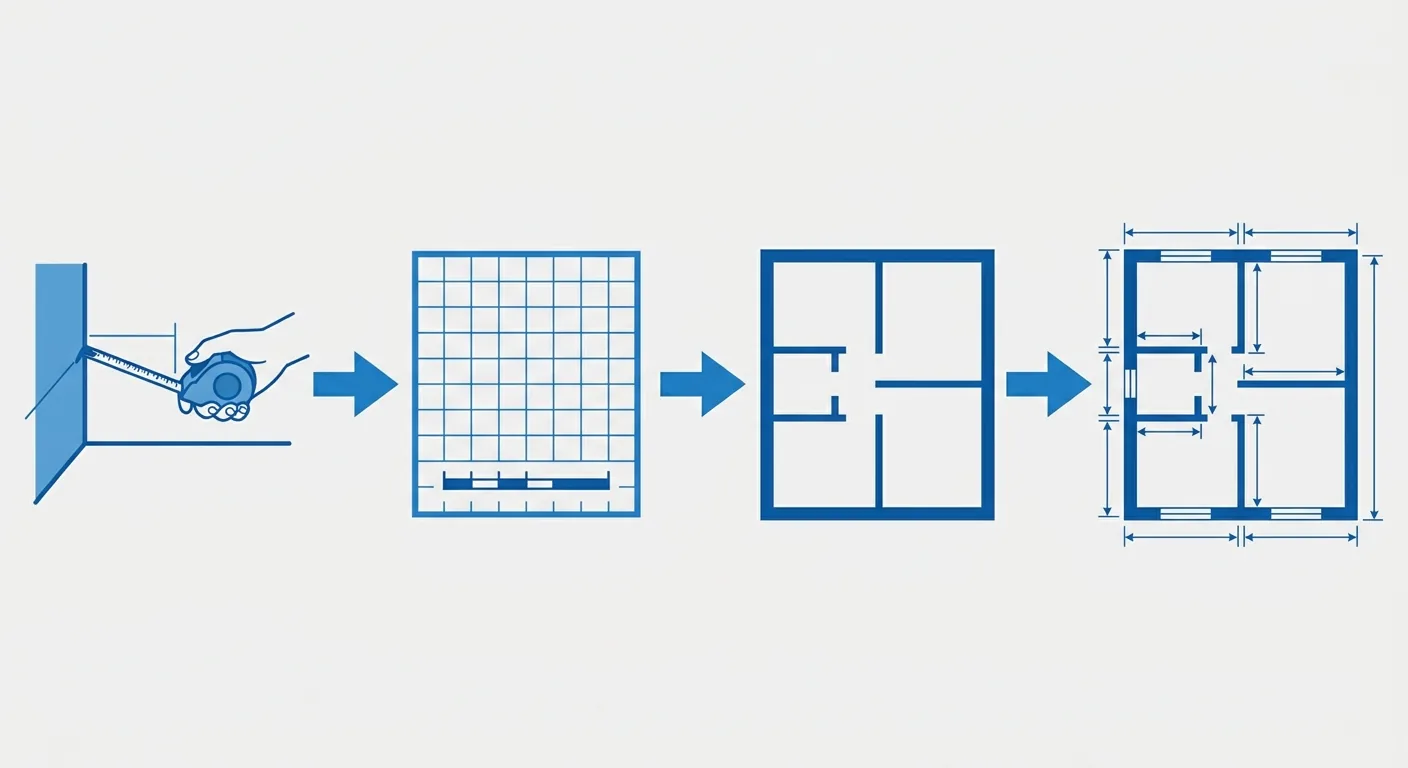
Caption: Four steps from measuring to a finished drawing: 1) measure the wall 2) set the scale 3) draw the exterior wall and partitions 4) label dimensions and check
The most time-consuming part of hand-drawing or Word is "converting the scale" and "drawing furniture symbols" — and these two are also the easiest to get wrong and the hardest to fix. Roomfit (roomfit.app) takes a different approach: enter a wall length directly on a true 1:1 board to pull out a partition, drag furniture in at real centimeter dimensions, and let the system maintain the scale — you never have to do the math yourself.
For beginners, this instantly lowers the barrier.
On the Roomfit board, if you want to draw a 4-meter wall, just enter 4 meters and the system draws it at the correct length right away. No need to first calculate "1/50 is 8 cm on the drawing," and no worrying about getting some wall's scale wrong.
Most drawing tutorials treat "figuring out the scale" as a must-learn skill, but for someone who just wants to get their own layout right, that step can actually be outsourced to a tool. We put our effort into letting ordinary people "get it right without knowing how to calculate scale," instead of forcing you to learn drafting first.
Once the walls are pulled, drag furniture in at true dimensions, and it snaps to the wall automatically while the system labels spacing in real time. Change a dimension and it updates instantly — unlike hand-drawing, where you have to erase and redraw.
When you're done, export it as a furniture list, PDF, or PNG to send straight to family or a contractor. No install, works right in the browser — no reinstalling when you switch computers or show it to family.
To be honest: a tool solves the "quickly lay out the floor plan and get the dimensions right" step — detailed construction drawings still need professional drafting software. Simulation is for catching the big picture; the actual site is still the reference. To check whether a hallway is wide enough, you can also compare it against the recommended values in our walkway width and circulation planning guide, or use the building code's minimum clear corridor width as a reference — at least 1.20 meters when a room's floor area is under 200 square meters (Building Technical Regulations, Architectural Design & Construction, Article 92, 2025).
The cost of drawing a floor plan spans a very wide spectrum. Doing it yourself by hand or with a free tool is essentially free; hiring someone or a designer to produce drawings is billed by complexity, number of sheets, and purpose, and the amount varies a lot case by case. The global home design software market was worth roughly $7.2 billion in 2025, projected to grow at a 9.1% CAGR to about $15.8 billion by 2034 (Home Design Software Market Report, 2025). More free and self-service tools are also part of why the barrier to doing it yourself keeps dropping.
Once you're clear on whether you're doing this "for yourself" or "for formal use," the cost question becomes easy to judge.
If you just want to get a rough sense of the layout before buying furniture, renting, or planning a renovation, drawing it yourself is completely free. Hand-drawing costs just a sheet of paper; a free online tool saves you even the software cost.
At this stage, what you want is "good enough, accurate enough to get the direction" — no need to spend money chasing perfection. Re-measuring important dimensions on site once is more worthwhile than paying for a drawing.
Situations that call for paying usually involve buying a used home with no digital drawing and needing to rebuild the layout for a contractor, or needing a formal drawing for construction or permit filing. Pricing for hiring someone depends on several factors: square footage, layout complexity, number of drawings needed, whether 3D is included, and how urgent the deadline is.
The amount varies a lot by case — we won't write down a fixed number here; go with the actual quote from your draftsperson or design firm, and compare a few before deciding.
The principle is simple: for a casual self-test-fit, a free tool is enough; for a formal construction drawing, permit filing drawing, or commercial use, you need paid professional drafting.
We've seen plenty of users who started out wanting to pay someone to draw, when the actual need was just "confirming whether the sofa fits." That kind of need is solved just by test-fitting with a free tool first — you can still bring in a professional once you're actually ready for construction. To find a tool that suits you, see our simple floor plan app comparison; for real examples by room, see our room-by-room floor plan examples.
Yes. The only hard parts of drawing a floor plan are "measuring accurately" and "keeping the scale consistent," neither of which requires a drafting background. Measure using the "along each wall segment" method, and use one scale consistently throughout. If you don't even want to calculate the scale, a 1:1 tool like Roomfit lets you just enter the wall length and the system maintains the scale automatically. The global floor plan software market was worth roughly $7.2 billion in 2025 (Floor Plan Software Market Report, 2025), and these barrier-lowering tools are spreading fast.
Feasible but laborious. The method: use table grid cells as a scale, use the shapes tool to pull rectangles into walls, and draw door, window, and furniture symbols yourself. The upside is that most people already have it and can save and print; the downside is that pulling the scale is a hassle and symbols need to be hand-drawn, which gets very taxing once the layout gets complex. If you're only drawing one or two simple rooms, Word will just about do; for a whole unit or frequent edits, a dedicated online tool saves a lot of effort.
Once you're familiar with the process, the base plan for a studio or small home takes about 30 minutes. Most of the time goes into measuring (walking the site and recording numbers) and labeling dimensions — drawing the walls themselves is quick. Your first attempt will be slower since you're looking up symbols as you go; an online tool with built-in symbols speeds things up considerably. The average home in Taiwan is roughly 31.5 ping (Ministry of the Interior Real Estate Information Platform, 2025), so a typical small home's base plan isn't a huge undertaking.
It's fine for conveying direction and discussing concepts, but a formal construction drawing should still come from a professional. A self-drawn plan is good for expressing "I want it arranged like this, I want to move this partition," helping the contractor understand your intent. Anything actually involving structure, plumbing/electrical, or permit filing needs drafting and certification from a qualified professional. Treat your own drawing as a "communication draft" and leave the formal construction drawing to a professional — that's the most practical division of labor.
Not necessarily, but grid paper is very beginner-friendly. The grid itself is a ready-made scale reference — just decide "one square equals how many centimeters" and drawing along the grid naturally keeps the scale consistent, saving you from calculating as you go. You can draw without grid paper too, just be more careful about maintaining the scale. With an online 1:1 tool, you don't need grid paper at all — the system handles the scale for you.
Arrange furniture in your space at true 1:1 scale with Roomfit and see exactly how much walkway is left — no install, no sign-up.
Start with Roomfit →