Want to see what your home would look like once it's furnished — and beautiful enough to brag about to family? Homestyler lets you arrange furniture right in the browser and uses AI to produce a photorealistic render. That's exactly why it's become such a popular entry point for the "I want a beautiful rendering" crowd.
This article walks through Homestyler from start to finish: how to register, how to use the web (desktop) version, arranging furniture, swapping materials, producing your first photorealistic render, and how far the free plan can take you. By the end, you'll be able to make your own rendered result. Want to confirm it's the right fit for you first? Compare it against this list of 9 tools before you dive in.
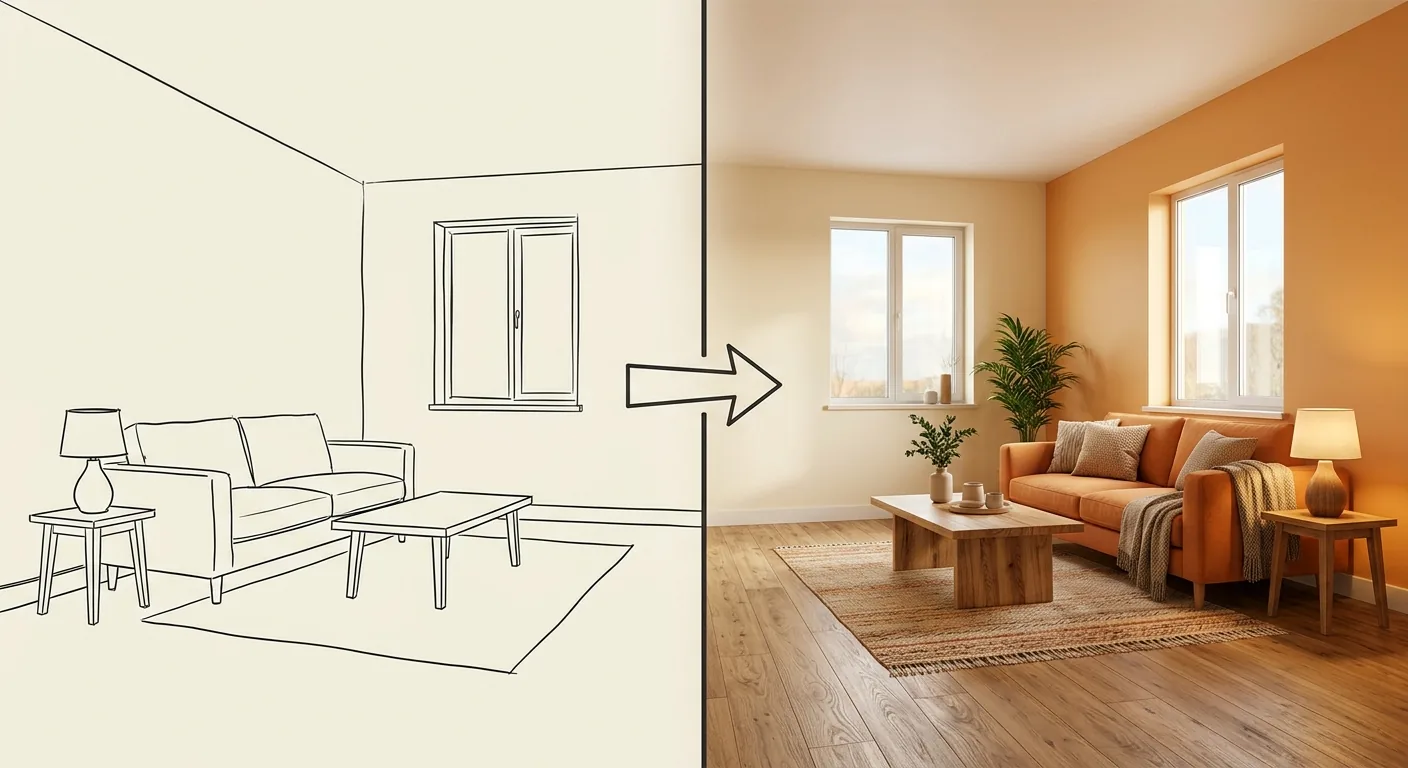
Caption: Homestyler's core strength — going from a line-drawing layout to an AI-rendered photorealistic image, selling you on "how it looks"
Key takeaway: Homestyler is a cloud-based, no-download home design tool with more than 20 million users worldwide, using NVIDIA-powered technology to drive AI rendering that turns a rough draft into a photorealistic 3D image (Homestyler Official Website, 2026). It's built around AI and rendering, making it a popular choice for anyone who wants a beautiful finished visual.
1What Is Homestyler? A Cloud Tool Built Around AI and 3D Rendering
Homestyler is a cloud-based, no-download home design tool used by more than 20 million people worldwide, driving its AI rendering with NVIDIA's technology to turn a rough draft into a near-realistic photorealistic image (Homestyler Official Website, 2026). It takes the rendering route, and its selling point is exactly that: "producing a beautiful 3D render."
In our own hands-on testing, what stood out most was speed. Arrange your furniture, hit render, and within a few minutes you get an image that looks genuinely professional. For anyone who wants to see results fast, that instant gratification is genuinely appealing.
Homestyler's Positioning: A Cloud-Based, No-Download Rendering Tool
Homestyler requires no download or installation — log in through your browser and you're set, with projects saved to the cloud so you can pick up where you left off on a different device. It takes a different approach from tools like Sweet Home 3D, which require downloading a desktop version: one prioritizes "beautiful rendering," the other prioritizes "accurate layout."
Its core lies in the rendering engine and AI. Your job is arranging furniture and materials; its job is turning that into a beautiful image. To understand where it sits in the overall tool landscape, revisit the Interior Design Software Overview.
AI and Asset Library: The Foundation for Fast, Photorealistic Renders
Homestyler has a massive asset library, with more than 300,000 branded furniture pieces alone (Homestyler Review, Unite.AI, 2025), covering a huge range of real, brand-name styles. That breadth of assets is what lets you arrange a space that feels close to real life.
AI has been its focus in recent years. It can turn a hand-drawn or simple sketch into a photorealistic 3D image, and can also suggest furniture layouts automatically based on room type. That means even a complete beginner with zero design experience can produce a respectable rendering.
Who It's For: Users Who Want a Beautiful Result to Share and Communicate
Homestyler is best suited to three types of users: homeowners who want to see "what my dream home would look like," people who need to communicate style and visuals with family or a designer, and freelancers who need to quickly produce a pitch-ready visual.
Who should skip it? If all you want to confirm is "will this set of furniture actually fit," Homestyler's rendering is overkill for you — you should use a tool focused on dimensions instead. Getting the positioning clear keeps you from using a sledgehammer to crack a nut.
2Getting Started With the Localized Interface and Web (Desktop) Version: Registration to Your First Render
Many people search specifically for a "localized version" or "desktop version" because they care about language and platform. Homestyler is a cloud tool used by more than 20 million people worldwide, requires no download, and supports multiple languages including localized interfaces (Homestyler Official Website, 2026) — opening it in a browser on your computer is essentially what's meant by the "desktop version."
Getting from registration to your first rendered image really only takes a few steps. Let's walk through it.

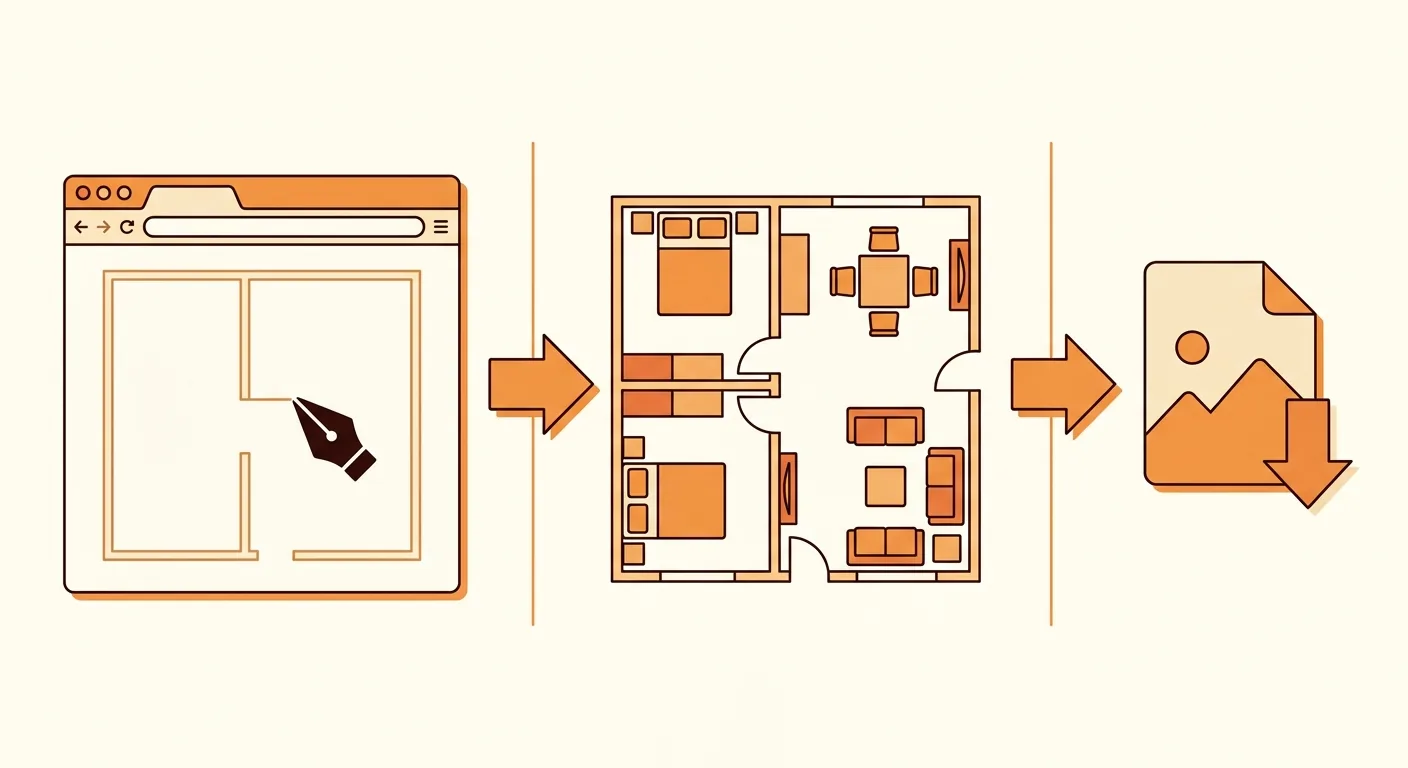
Caption: Homestyler's three-step onboarding (1) register an account and switch to your preferred language (2) create a room project (3) arrange your furniture and hit render
Registering an Account and Switching to a Localized Interface
Go to Homestyler's official site and register with an email or a third-party account, then log in and switch the language to your preference in the settings. Do this step first — it'll save you effort navigating menus and finding tools later.
Registration is free. Once your language is switched, tool names for drawing walls, arranging furniture, and swapping materials all become much easier to follow, so beginners won't get stuck on English right out of the gate.
An Overview of the Web (Desktop) Operating Environment
Homestyler's "desktop version" is simply the web version — open it in a browser and log in, no software installation required. Its interface is split into an asset library on the left, a canvas in the middle, and a properties panel on the right, following the same logic as most design tools.
Working on a large computer screen is much smoother than on a phone, especially for detail-oriented dragging actions like arranging furniture and adjusting materials. We'd recommend learning it on the desktop version the first time — the wider view makes it easier to pick up.
Creating Your First Room Project
Start a new project and frame out the room first. You can use a template room shape or draw the walls yourself. When drawing walls, you can set dimensions so the space matches your home's actual size.
Once the room is framed, you can start filling it in. At this point you have an empty room on the canvas, and the next step is giving it content and style.
3Arranging Furniture, Swapping Materials, and Rendering: The Basic Workflow for a Photorealistic Result
Homestyler's rendering workflow is "arrange furniture → swap materials → render." Its asset library contains more than 300,000 branded furniture pieces (Homestyler Review, Unite.AI, 2025), so you'll almost always find the style you want — a precondition for producing a photorealistic image.
Complete these three steps and you'll have your first finished render. Here's how it breaks down.

Caption: Swapping materials sets the style, hitting render outputs a photorealistic image — the higher the quality setting you choose, the longer the render takes
Dragging in Furniture and Arranging the Layout
Drag sofas, tables, beds, and lighting from the asset library on the left into the room and arrange them the way you want. Every piece of furniture can be rotated, moved, and resized. One reminder here: it may look beautiful on screen, but don't forget real-world dimensions — looking right on screen doesn't mean it actually fits.
When arranging, start by pinning down the position of your large furniture pieces first, then fill in the smaller ones. Layout is the skeleton of a rendering, so nail down the big-picture direction first.
Swapping Materials, Flooring, and Wall Finishes
Once furniture is placed, swap materials to establish the style. Change flooring to wood grain or tile, walls to a paint color or wallpaper, sofas to fabric or leather — swap any of these and the tone of the whole space shifts.
This is the fun part of Homestyler. The same set of furniture can go from Scandinavian to industrial style just by changing the floor color. Try a few different color combinations and you'll get a clearer sense of what you actually like.
Rendering and Outputting Your Result
Once you're happy with the layout and materials, hit render. Homestyler uses AI to accelerate the rendering process — choose your viewing angle and quality setting, wait a few minutes, and you'll get a photorealistic render. Higher quality settings mean more detail, but also longer render times.
Once rendered, the image can be downloaded and shared. The first time we rendered an image, we were genuinely surprised — even someone with zero design background can produce this kind of result. That's exactly the appeal of a rendering tool.
4How Far the Free Plan Goes and Where Limits Kick In: Who It's Suited For
Homestyler's free plan is actually quite generous. It offers unlimited free renders at 1K resolution, with the higher 4K resolution requiring a paid upgrade (Homestyler Review, Unite.AI, 2025). In other words, the free plan is plenty for everyday style-browsing and drafting.
So when do you actually hit the limits? Let's break it down.
What the Free Plan Covers
The free plan lets you register, create projects, arrange furniture, swap materials, render at 1K, and use the basic AI features. For a homeowner who just wants to "see whether the arrangement looks good," this is more than enough. You can produce a stack of respectable renders without spending a dollar.
Project count and some premium assets may have limits, but general planning rarely hits the ceiling. Getting comfortable with the free plan first is the most cost-effective starting point.
Where High-Resolution Output and Advanced Features Cost Money
Paid features mostly come down to "high-resolution output" and "advanced features." The free plan gives you unlimited 1K, while 4K — print-quality, pitch-ready resolution — requires payment (Homestyler Review, Unite.AI, 2025). Some professional assets and batch processing may also sit behind paid plans.
So whether it's worth paying comes down to whether you need that "still crisp when printed" high-resolution image. For your own reference, 1K is enough; for external pitches or printing, that's when you upgrade.
Scenarios It Suits and Doesn't Suit
Suited for: anyone who wants to quickly see a style, draft a visual concept, or communicate "what it would look like once furnished." Homeowners who want a beautiful result but have a limited budget can get most of what they need from the free plan.
Not suited for: anyone who just wants to confirm "does this furniture actually fit at its real size." However beautiful the render, it's no guarantee the furniture will physically fit. That kind of "get the fit right first" need is faster to solve with a dimension-focused tool, which we'll cover in the next section. If you want to compare other rendering platforms, see the Kujiale and Coohom tutorial.
5Roomfit vs. Homestyler: Get the Real Dimensions Right First, Then Move Into Homestyler for the Beautiful Render
Homestyler's strength is a photorealistic, visually beautiful render — its job is "making it look good." But as DIY home renovation keeps growing, more and more homeowners are arranging furniture themselves — and they often overlook one thing: a rendered image can subtly adjust proportions to make a sofa look "just right," but the real world doesn't adjust anything.
That's exactly the gap Roomfit was built to fill. It isn't a competitor to Homestyler — it's a relay partner.
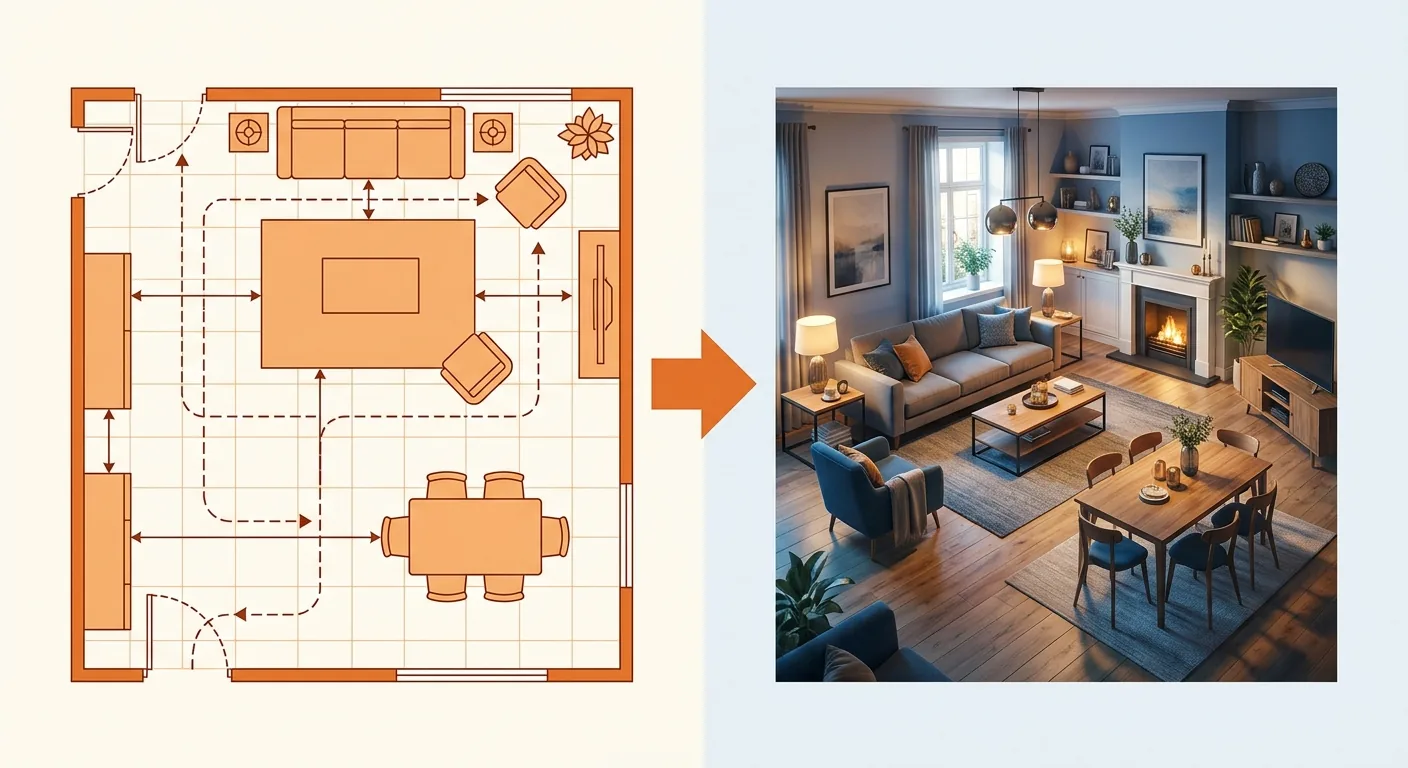
Caption: The smoothest division of labor — use Roomfit first to confirm the furniture fits and walkways work at true 1:1 scale, then move into Homestyler to render it into a beautiful visual
Homestyler's Strength: Photorealistic Rendering
Homestyler nails "producing one beautiful image." Rich assets, fast AI, good render quality — you can produce a near-realistic image that holds up in communication. This is where it's most worth using.
It makes "looking beautiful" easy. Even without a design background, you can produce a render — very friendly for homeowners. Play to your strengths.
Roomfit's Difference: True 1:1 Scale, No Download, Collaborative Editing
Roomfit and Homestyler have three objective differences.
- Accurate scale: Furniture is placed using real 1:1 centimeter measurements, with walkway and furniture clearances flagged automatically — confirming what "will actually fit," not just "looks right on screen."
- No download required: Opens right in the browser, zero installation — just as lightweight as Homestyler in this regard.
- Collaborative editing: Multiple people can arrange the same floor plan at the same time, so family members and designers can work out positions together.
The difference is in purpose. Homestyler optimizes for beauty; Roomfit optimizes for accuracy.
Our Recommended Order: Fit First, Then Beauty
The smoothest workflow is a relay: use Roomfit first to place furniture at true 1:1 scale, confirm the walkways are clear and the clearances are sufficient, then move that "confirmed-to-fit" layout into Homestyler and render it into a beautiful image.
This way you avoid the tragedy of "rendering a beautiful image, then discovering on moving day that the sofa is stuck at the door." If you want to verify dimensions before drawing a formal floor plan, you can also pair this with the Floorplanner online floor-plan tool. Get the fit right first, then make it beautiful — the right order saves the most trouble.
6Conclusion: For a Beautiful Render, Homestyler Is an Easy Choice to Pick Up
Homestyler is no-download and AI-powered, used by more than 20 million people worldwide to produce renders (Homestyler Official Website, 2026). Its localized interface, web (desktop) version, and rendering workflow are all beginner-friendly, and the free plan's unlimited 1K rendering already satisfies most needs — you only need to pay for 4K high resolution.
But a render's job is "making it look good," not "confirming the dimensions." A rendered image can subtly adjust proportions; real furniture can't. So to stay safe, use Roomfit's true 1:1 scale, no-download, collaborative editing to get your furniture placement right first, then move into Homestyler to render it beautifully — the two working in relay is the safest way to avoid mistakes.
7FAQ
Is Homestyler free? How many renders can the free plan produce?
Homestyler can be registered and used for free, and the free plan offers unlimited 1K-resolution renders, with the higher 4K resolution requiring payment (Homestyler Review, Unite.AI, 2025). In other words, for everyday style-browsing and visual drafts, the free plan is more than enough and you're unlikely to hit a rendering-count ceiling. You only need to upgrade for print-quality, pitch-ready high resolution.
Does Homestyler have a localized version?
Yes. Homestyler is a cloud tool used by more than 20 million people worldwide and supports multiple languages including localized interfaces (Homestyler Official Website, 2026). After logging in, switch the language in the settings, and tools for drawing walls, arranging furniture, swapping materials, and rendering will all switch to your preferred language, lowering the barrier for beginners who find English intimidating.
Do I need to download the Homestyler desktop version?
No. Homestyler's "desktop version" is simply the web version — open your browser on a computer and log in, no software installation required, with projects stored in the cloud. Working on a large screen is much smoother than on a phone, especially for detail-oriented dragging actions like arranging furniture and adjusting materials. We'd recommend using the desktop version the first time you learn it — the wider view makes it easier to pick up.
How long does rendering take on Homestyler? Is the quality good?
Homestyler uses NVIDIA-powered technology to accelerate AI rendering, with a typical render completing within a few minutes — the higher the quality setting, the more detail and the longer it takes (Homestyler Review, Unite.AI, 2025). The free 1K resolution is already quite realistic for everyday reference, while 4K suits print or formal pitches. Actual timing will vary slightly depending on your chosen angle, quality setting, and current cloud load.
Is Homestyler better for beginners or professional designers?
Both can use it, but for different purposes. Beginners rely on its large asset library and AI suggestions to produce a render without any experience; professional designers often use it for quick concept pitches. Its user base spans DIY homeowners to professional architects (Homestyler Review, Unite.AI, 2025). If you just want to confirm whether furniture fits, that "get the fit right first" need is faster to solve with Roomfit's true 1:1 scale.
8Related Reading
- The Complete Guide to AI Interior Design: Generation Workflow and 3D Rendering
- How Do You Make a 3D Interior Design Rendering? Online Rendering Tools and Workflow
- A Guide to 3D and AI Interior Design Software and Furniture Model Libraries