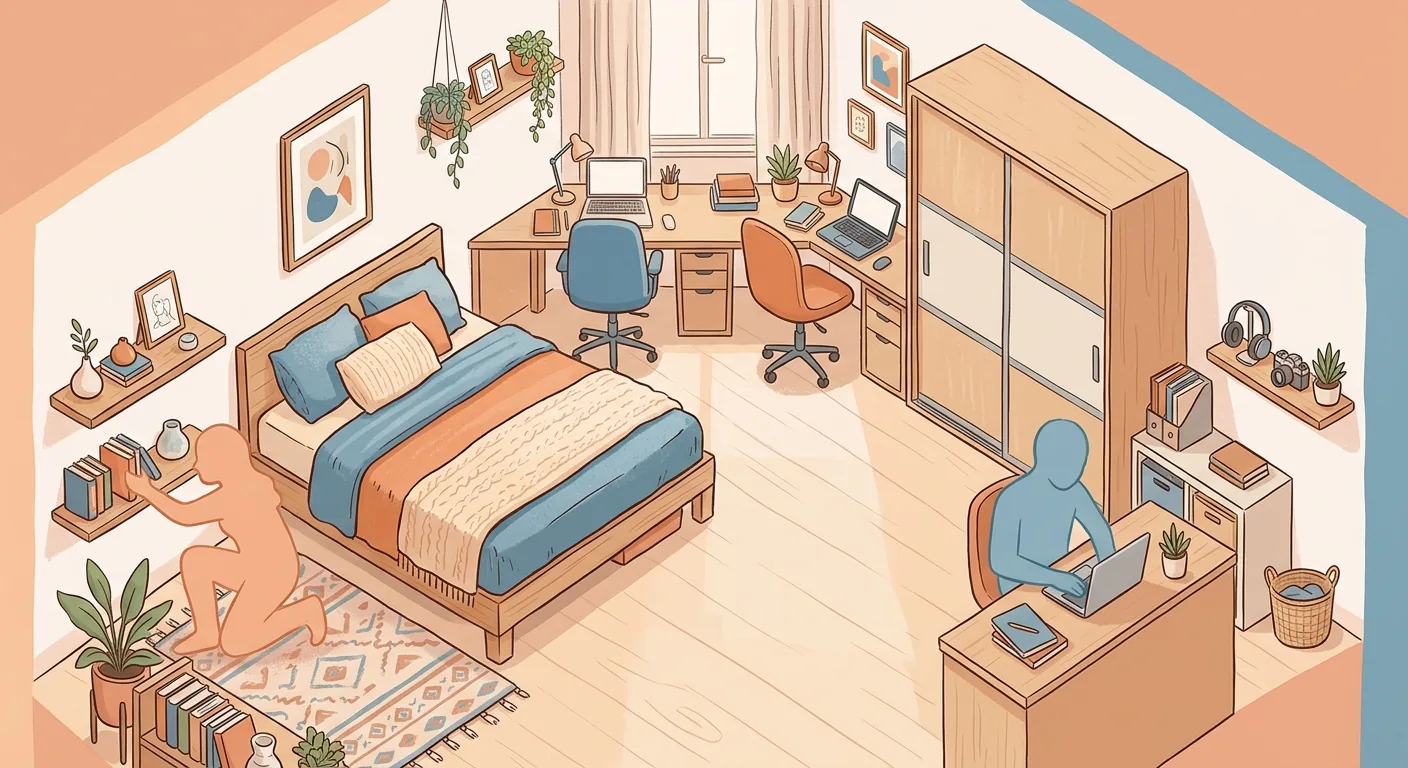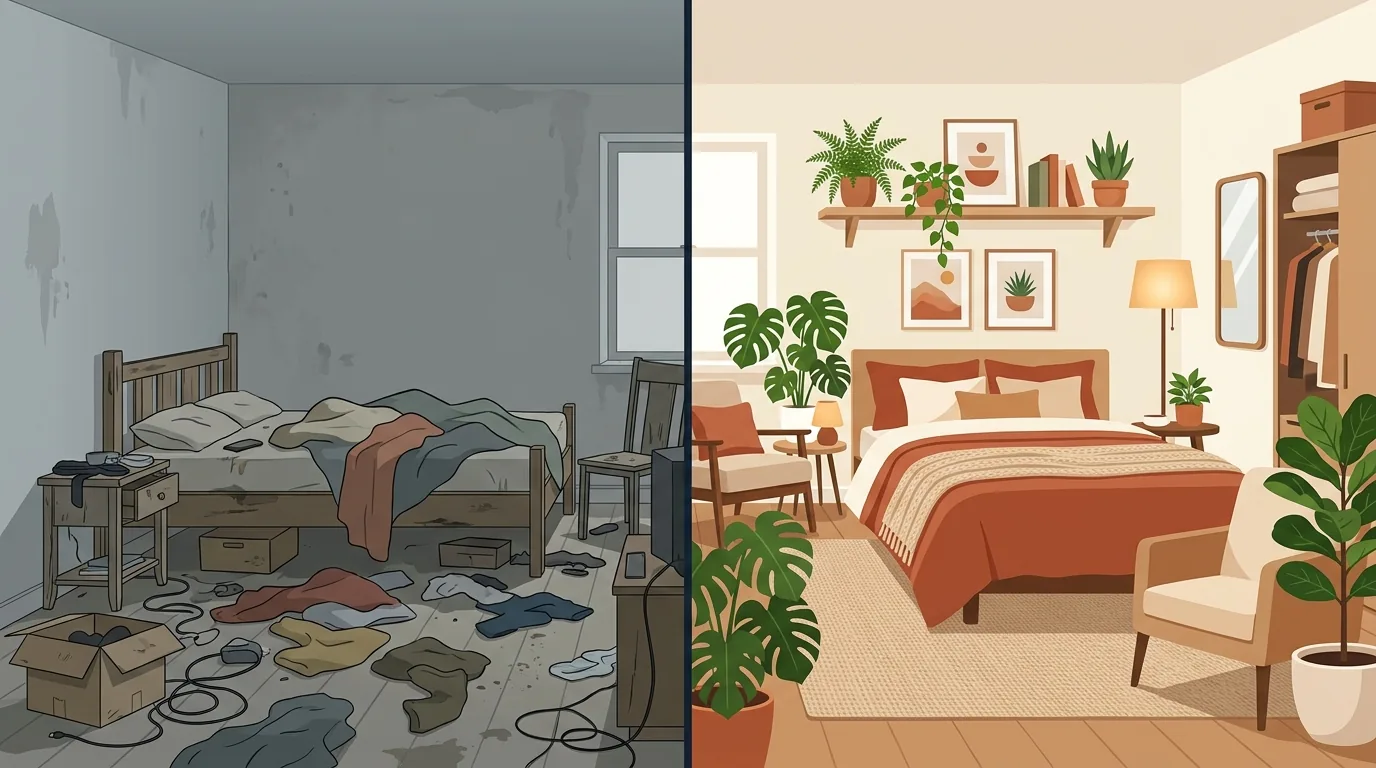

A rented room is exactly the room that needs the most careful calculation. You can't knock down walls, you can't take apart built-in cabinets, and every dollar needs to go toward things you can take with you. Yet most people start by scrolling Instagram and saving a pile of beautiful photos, only to discover — once the furniture arrives at the door — that the bed doesn't fit, the wardrobe door won't open, and the aisle is barely wide enough to turn sideways.
The problem isn't your taste — it's that the order is backwards. The very first thing you should actually do in rental styling is measure the room accurately and get the furniture placed correctly — looks come last. This piece walks you through the complete workflow: three core principles, aisle-clearance guidelines, movable affordable furniture, small-studio storage, and finally how to apply all of it across different room types.
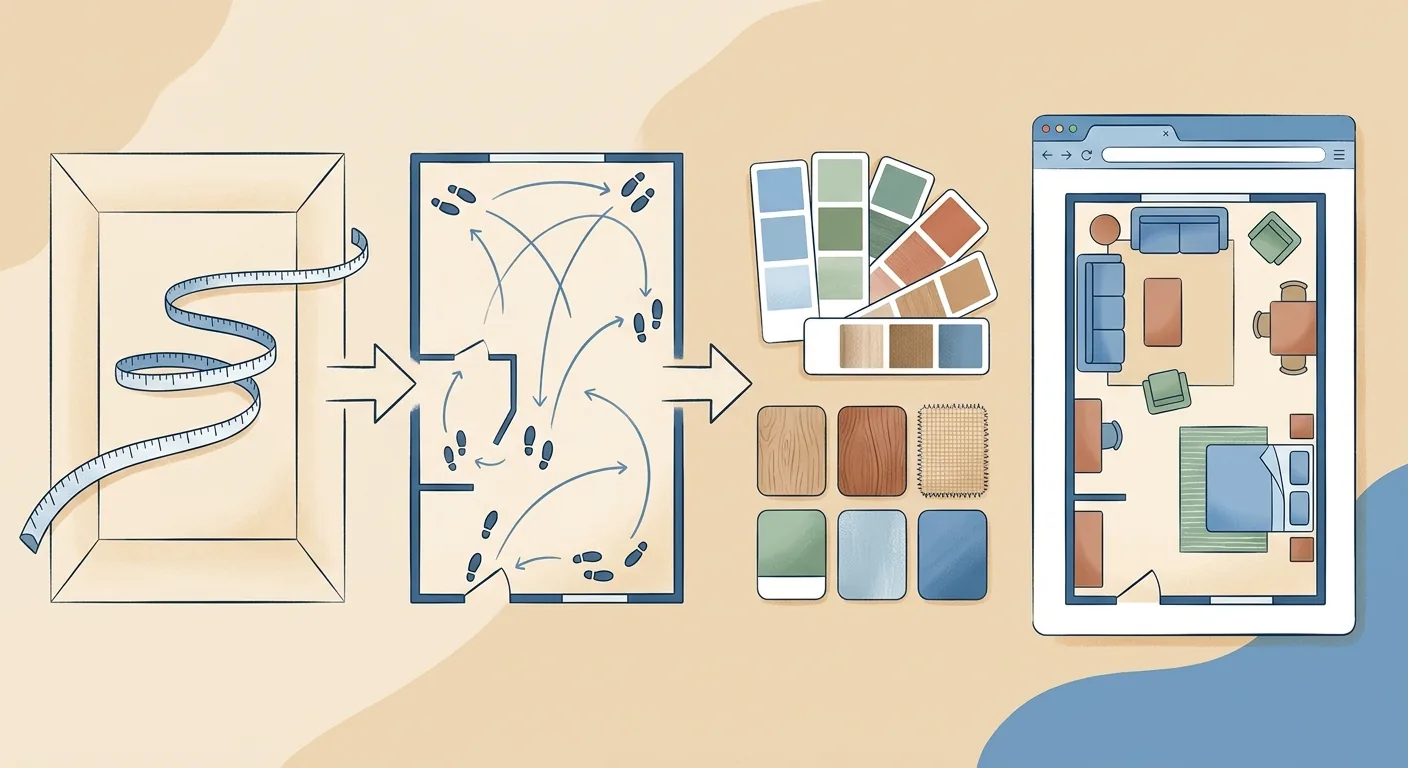
Caption: The correct order for rental styling = (1) measure first (2) define traffic flow next (3) pick a style last — the browser tool on the right handles all three in a true-to-scale layout at once
Key takeaway: Per the Directorate-General of Budget, Accounting and Statistics household survey, roughly 15.6% of households in Taiwan still rent as of the end of 2024 (with an 84.4% homeownership rate). The key to rental styling isn't picking a style first — it's getting dimensions and traffic flow right first, then talking about looks, so when you move out, the same furniture can be re-laid into the new floor plan.
1The Three Principles of Rental Styling: Measure First, Define Traffic Flow Next, Pick a Style Last
According to the Taipei City DGBAS household survey, "housing services, utilities, and other fuel" accounted for 28.49% of household consumption spending in 2024 — the single largest category among all items (Taipei City DGBAS, 2024). Housing already eats up this much of the budget, so styling can't afford costly mistakes. There are only three steps, in this order: measure first, then define traffic flow, and pick a style last. This order determines whether every piece of furniture you buy actually fits and gets used.
We've moved three times ourselves, and every single time we went wrong, it was for the same reason — looking at pretty photos and picking a style first, measuring dimensions dead last. The result? A bed frame 10 cm bigger than expected, a wardrobe door that hits the edge of the bed the moment it opens. Get the order backwards, and everything downstream goes wrong.
Why Starting With Pretty Photos Backfires
A pretty photo is someone else's dimensions, not yours. That clean Scandinavian-style studio on Instagram might be a spacious 26 m² (roughly 8-ping) unit with the beams conveniently out of the way. Move the exact same furniture set into a 13 m² (roughly 4-ping) single room, and the proportions fall apart completely. People who start with pretty photos are buying a "mood"; people who measure their room first are buying "something that actually fits." These two are very different things.
Looks obviously matter. It just needs to come last — only once dimensions and traffic flow both work out does style have room to land.
What Renters Should Actually Measure
Grab a tape measure and get these numbers down clearly: room length and width, ceiling height, door and window positions and swing direction, how far beams and columns protrude, and the location of outlets and network jacks. These are the foundation of your styling. Get the foundation wrong, and whatever you build on top of it will be crooked.
Two things especially worth flagging that people often overlook: the door's swing radius, and the actual usable height under a beam. A lot of people measure the floor area but forget how much space the door swing eats up, only to discover a large bed jammed against the door frame. First-time student renters especially tend to miss this — we cover a more complete room-viewing checklist in The Complete Guide to Student Rental Setup and Precautions.
Traffic Flow Gets Decided Before Style Does
Traffic flow is how you move around the room every single day. From the door to the bed, from the bed to the desk, turning around after grabbing clothes from the wardrobe on your way out — whether these paths flow smoothly determines whether living there feels comfortable or cramped. Get the traffic flow right, and even a small room never feels crowded; get it tangled, and even a big room feels hard to live in.
Draw your measured room into a floor plan at true-to-scale sizing, and use an online tool like Roomfit to automatically mark the clearances — that's how "get the placement right first, then chase looks" turns from a slogan into a step you can actually follow. If you're planning a bigger transformation, check the reversible approach in Rental Makeover Before and After first.
2Using Roomfit to Measure and Lay Out Furniture at True Scale: The Aisles and Clearances Renters Most Often Overlook
Per Ministry of the Interior real estate data for the first half of 2025, even a single room under 30 years old in an educational district like Taipei's Da'an District carries a median monthly rent of about NT$8,210 (Ministry of the Interior Real Estate Information Platform, 2025). Paying that kind of rent means every square inch of space needs to be put to good use. And what renters most often overlook is exactly the "invisible space" — aisle width, door-swing clearance, the floor space in front of furniture.
Upload your measured dimensions to a tool, calibrate the scale, and drag the bed, desk, and wardrobe in at true-to-scale sizing. The system will instantly mark the distance between each piece of furniture and to the walls. This is the step where renters feel the most impact: get the placement right on screen first, and you'll never move furniture in only to discover you can't get around it.
Step 1: Measure the Room and Calibrate the Scale
The first step is making the room on screen match the real room exactly. After uploading a floor plan or a hand-drawn sketch, use the ruler tool to calibrate the scale — tell the system "this wall is actually 300 cm" — and every piece of furniture you drag in afterward will be sized to match. If the scale isn't calibrated, no matter how nicely you lay things out afterward, it's all fake. This step takes less than two minutes but is the foundation of the entire process.
Step 2: Drag in True-to-Scale Furniture
Next, drag furniture into the room at its actual dimensions. Pieces snap and align automatically against a wall — no manual nudging needed. In actual use, we dragged a 120 cm double-drawer desk into a simulated 10 m² (roughly 3-ping) room, and the aisle instantly shrank to just 40 cm — a problem you can spot at a glance on screen, but that would be a disaster the moment you tried it in real life after moving in.
Step 3: Read the Automatic Clearance Markers
Once the furniture is placed, the system marks the aisles and clearances. Here's an ergonomics reference guideline (not a mandatory code requirement — adjust for actual body size and usage habits):
| Passage Type | Recommended Clear Width | Purpose |
|---|---|---|
| Main aisle | 60–90 cm | Main daily traffic route, comfortable to pass through |
| Side-body passage | 45–60 cm | Secondary route, can pass sideways |
| In front of wardrobe/drawers | 75–90 cm | Room to open the door, pull out drawers, and bend down |
| Getting-out-of-bed side | At least 50–60 cm | Room to sit up, get out of bed, and make the bed |
These numbers look nitpicky, but they're exactly what separates "comfortable to live in" from "not." A 15 cm difference in aisle width makes a huge difference in how it actually feels.
How to Re-Lay Out the Floor Plan When You Move
This layout isn't a one-time thing. When you move out and into your next room, just drag the same furniture into the new layout again — it's not some one-click magic move button, just re-placing your existing furniture within the new wall lines. All the effort you put into styling carries over — moving means re-laying out, not starting from scratch. This is especially useful for renters who move frequently.
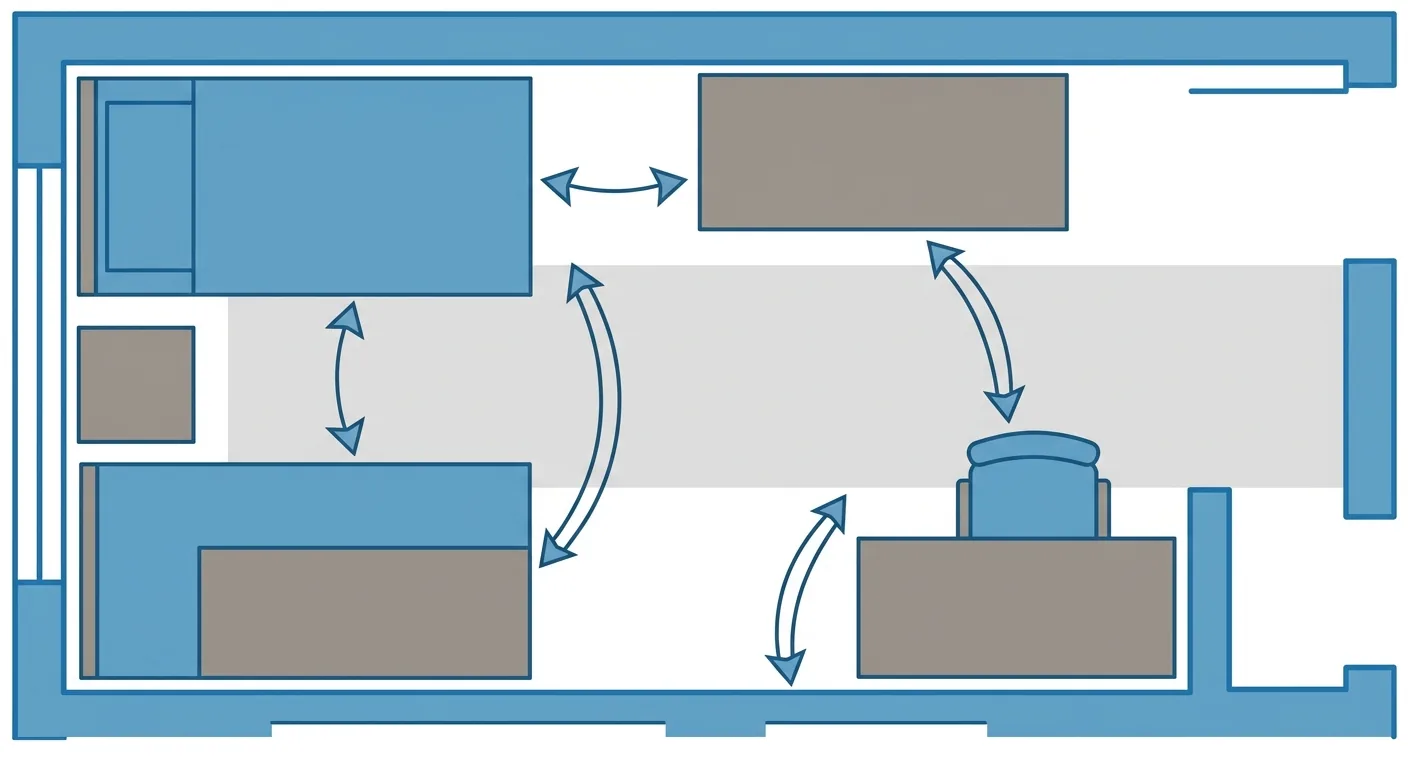
Caption: Aisle-clearance guidelines — 60–90 cm for the main aisle, 45–60 cm for a side-body passage, 75–90 cm in front of a wardrobe — measure it right on screen first, then move the furniture
3How to Pick Affordable Rental Furniture: A Checklist for Movable, Drill-Free, Lightweight Pieces
With housing-related spending already accounting for nearly 30% of household consumption (28.49% per the Taipei City DGBAS 2024 household survey), your furniture budget needs to go toward things you'll actually use and can take with you (Taipei City DGBAS, 2024). Rental furniture shopping splits into two scenarios: starting from zero in an unfurnished unit, or filling gaps in a partially furnished one. The shopping list looks completely different for each.
Whichever scenario you're in, stick to three principles: removable and movable, drill-free and non-destructive, lightweight and easy to relocate. These three are what set apart rental styling from styling a home you own.
The From-Zero Shopping List for an Unfurnished Unit
An unfurnished unit needs to cover all your living essentials at once. The recommended priority order is: sleep first, then storage, then desk and chairs, and decor last.
- Bed and mattress: sleep is a non-negotiable eight-hour need every day — settle this first. If you're renting alone, consider a bed frame with built-in storage.
- Storage: modular shelving units and rolling storage cabinets determine whether your room stays tidy or falls into chaos.
- Desk and chairs: a folding or adjustable-height desk handles both work and dining, doing double duty as one piece.
- Soft furnishings: curtains, rugs, and lighting come last, added once the essentials are all in place.
The Fill-the-Gaps List for a Partially Furnished Unit
A partially furnished unit usually already comes with a bed frame, wardrobe, and air conditioner from the landlord. Your job is to "fill the gaps," not buy everything again. Check carefully what's included and what's missing, and buy only what's genuinely missing: a desk, a chair, an extra storage piece, one good desk lamp. Whatever you do, don't buy duplicates of the big items the landlord already provided — that's money wasted and space taken up for nothing.
Selection Principles for Movable, Drill-Free Furniture
Rental makeovers fear touching the wall most of all. Screw-free metal racks, floor-to-ceiling tension-rod shelving, residue-free hooks, and peel-off wallpaper all refresh the look without leaving a single hole behind. Think of storage as "placement-based, not mounting-based." We've put together this complete drill-free approach in Decorating Guide for No-Drilling and Lease-Restricted Rentals.
Affordable doesn't have to mean settling. The key is putting your money into high-use, movable furniture. For a more detailed budget breakdown, check the money-splitting method in Budget Renter Styling Money-Saving Guide. Plan it out in a tool first, confirm the dimensions and aisles all check out before checking out, and you'll save yourself the hassle of returns and exchanges.
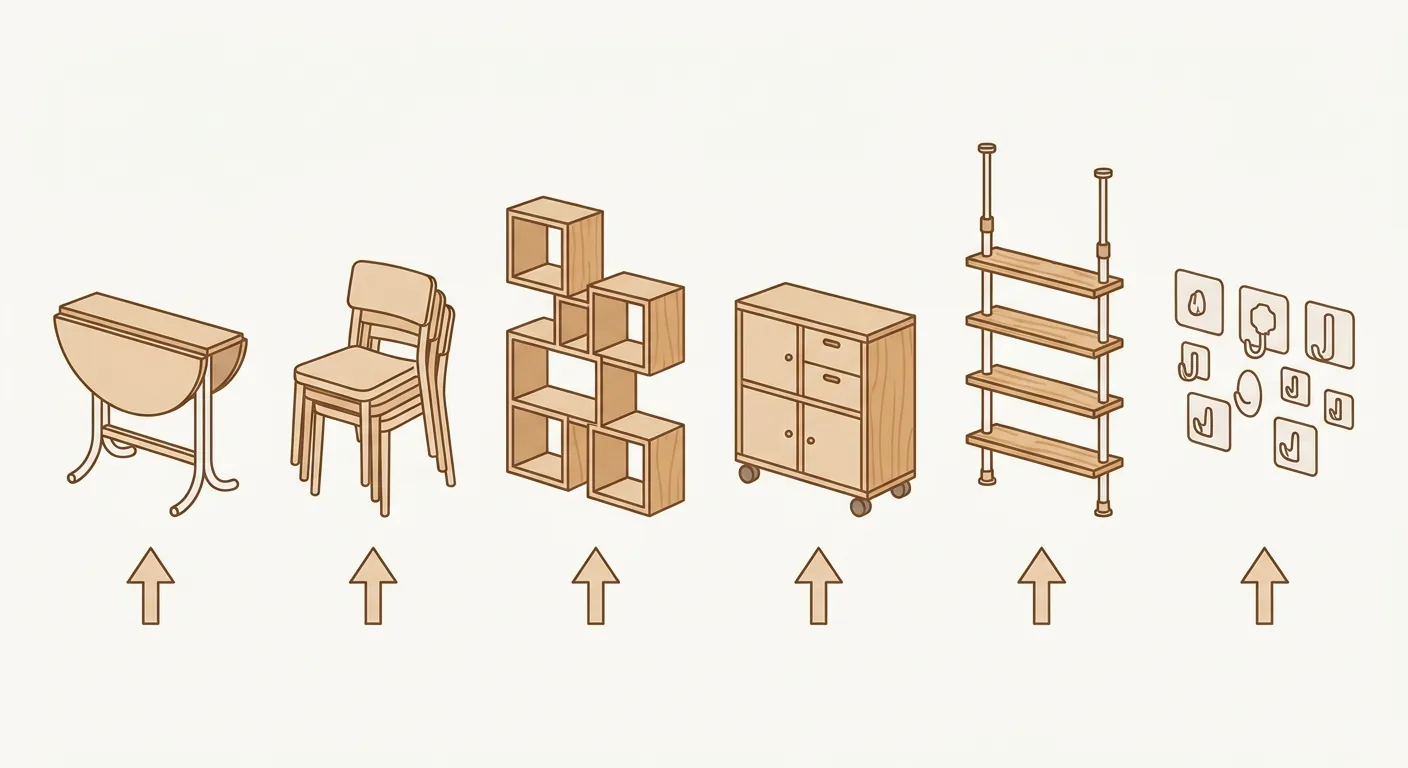
Caption: Three principles for choosing rental furniture — removable and movable, drill-free and non-destructive, lightweight and easy to relocate; all six pieces shown here can go with you and won't be wasted at move-out
4Small-Studio Storage Tricks: Vertical Space, Under-the-Bed, and Multi-Purpose Furniture Planning
Ministry of the Interior data for the first half of 2025 shows single rooms and independent studios — small, compact units — are the dominant rental type in urban areas (Ministry of the Interior Real Estate Information Platform, 2025). Storage in a small studio boils down to three ideas: grow upward, hide downward, and make every piece do double duty. Every square inch of your limited floor area should be worked into the plan.
A small room isn't about having fewer things — it's about hiding them cleverly. Leave the floor for the aisle, and push storage up onto walls and into furniture.
How to Grow Storage Vertically
The stretch of wall between eye level and the ceiling is the most-wasted space in a small studio. Use shelving, pegboards, and floor-to-ceiling cabinets to stack storage upward, freeing up the floor for the aisle. Grow storage upward, and the room feels wider on the ground. One well-used wall can hold as much storage as half a room.
Under-the-Bed and Awkward Corners
The space under your bed is the biggest hidden storage room in the entire space. Under-bed drawers, a lift-up bed frame, or slide-in storage bins can hold all the seasonal bedding, luggage, and rarely used items. Use a corner shelf or angled storage piece to swallow up that awkward wall corner that's the hardest to use. Once you put these dead zones to work, your storage capacity doubles instantly.
Choosing Multi-Purpose Furniture
One piece doing the job of two is the space-saving rule for a small studio. A folding dining table, a sofa bed, a bed frame or ottoman with built-in storage — reducing your total furniture count is exactly how you win back space for a small room. When picking multi-purpose furniture, ask just one question: how many needs does this one item solve for me? The more it answers, the more worth buying.
Plan the Open/Close Clearance Together
This is the trap most people fall into. Can the drawer actually pull out? Does the cabinet door actually open? We once placed two storage cabinets too close together in a simulated room — on screen it looked like it "fit," but in reality the drawers jammed against each other and wouldn't open. So when laying out storage furniture, plan the open/close range of drawers and doors right along with it — don't just calculate the footprint of the cabinet body itself. Planning a bigger makeover? Check Rental Makeover Before and After for how to lay out two versions to catch this kind of pitfall.
5Sample Layouts for a Two-Bedroom Apartment and a Single Room: How to Adapt to Different Room Types
According to the Ministry of Education, roughly 300,000 college students alone are renting off-campus, accounting for about half of all students with housing needs (Ministry of Education Department of Statistics, academic year 106). Rental room types come in every shape, from a single room to a full two-bedroom apartment. The good news: it's the same set of principles — only how you apply it changes. Here are three common room types as examples.
The same "measure first, define traffic flow next, pick a style last" logic, applied to different layouts, naturally lands differently.
Invisible Zoning for a Studio
A studio is a single open space — sleeping, working, and living all crammed together. Zoning doesn't rely on walls — it relies on furniture and rugs. A rug marks out the living zone, a desk turned away from the bed defines the work zone, and an open shelving unit acts as a half-wall to separate off the sleeping zone. Using "placement" to create invisible boundaries suits renting far better than putting up an actual wall — because you can always re-lay it out.
Layout for a Small Single Room
A single room is usually even smaller, and often shares a bathroom and kitchen. With limited room, focus on getting "sleeping" and "reading" laid out well, and let shared functions default to the common areas. Push storage vertically and keep the floor as clear as possible. A single room doesn't need to cover every function — it needs the core functions to be comfortable.
Functional Division for a Two-Bedroom Apartment
A two-bedroom apartment adds a second bedroom and a living room, allowing real functional division: the primary bedroom for rest, the second bedroom as a home office or guest room, and the living room for hosting guests and relaxing. Lay out traffic flow along the natural sequence of "come home → put down your bag → sit down" — don't make yourself walk the long way around your own home every day. If a couple or roommates are sharing the two-person room, they also need to consider each person's private corner — Couple Rental Styling Guide covers this in more detail.
For every room type, lay out a sample version in a tool first, then fine-tune it to fit your actual room. The room type differs, but the method stays the same.
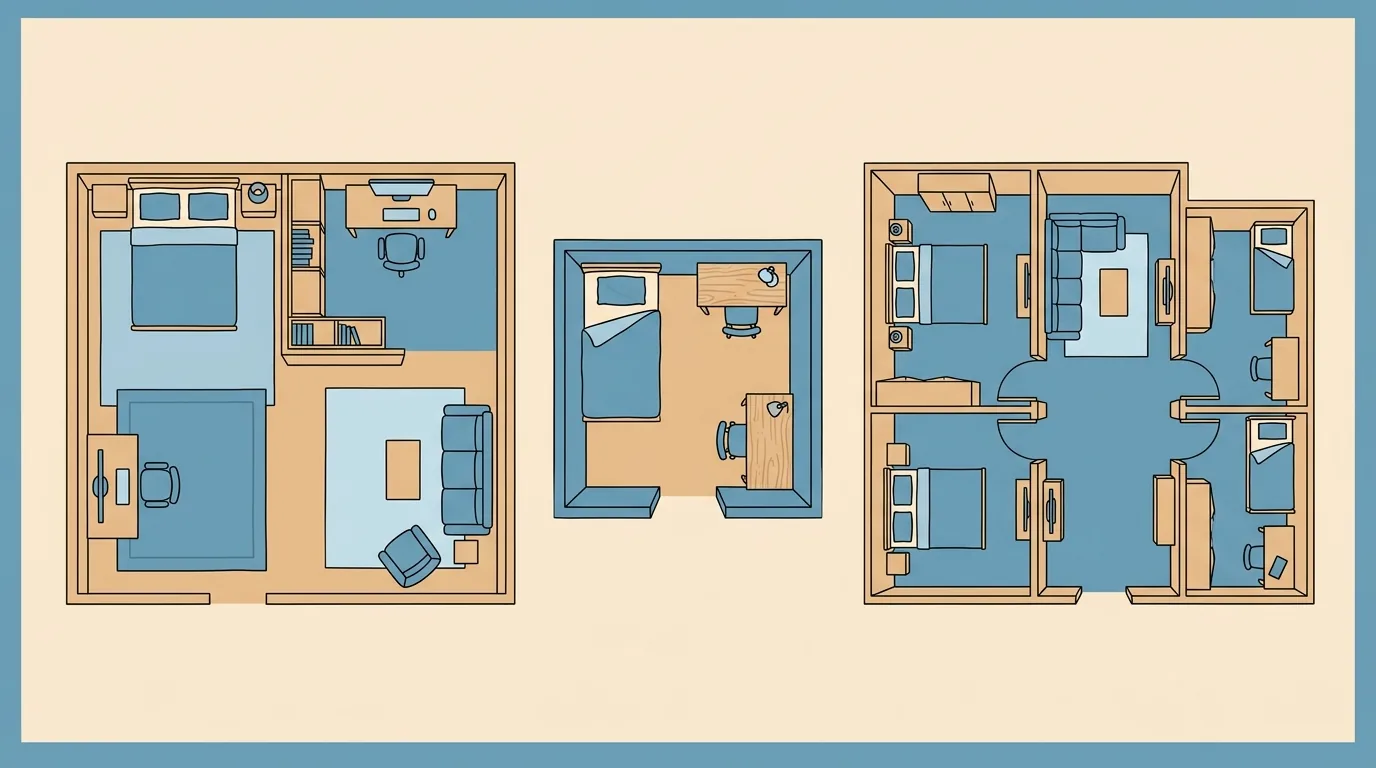
Caption: Same principles, three room types — a studio uses furniture for invisible zoning, a single room focuses on sleeping and reading, and a two-bedroom apartment divides function by room
6Get the Placement Right First, Then Look Beautiful: Turning Rental Styling Into a Step-by-Step Process
After all that, the logic of rental styling is actually simple: measure first, define traffic flow next, pick a style last. Remember this order, and every piece of furniture you buy will fit, get used, and go with you when you move. Your rental unit may not be yours to keep, but how comfortable it feels to live in is entirely up to you.
What you're really saving is the wasted money and return-shipping time from "buying something and then finding out it doesn't fit." Lay your room out at true-to-scale sizing on screen first, then start buying and moving furniture in — your odds of a costly mistake drop dramatically. When you move to your next room, just keep this layout and re-lay it out.
Nervous about your first time renting? Read through The Complete Guide to Student Rental Setup and Precautions first. Tight on budget? Budget Renter Styling Money-Saving Guide teaches you how to split your money. Moving in with someone? Couple Rental Styling Guide helps you fit both of your needs into the same room. Strict landlord, can't touch the walls at all? See Decorating Guide for No-Drilling and Lease-Restricted Rentals. Want a big transformation without risking your deposit? Rental Makeover Before and After demonstrates the reversible approach.
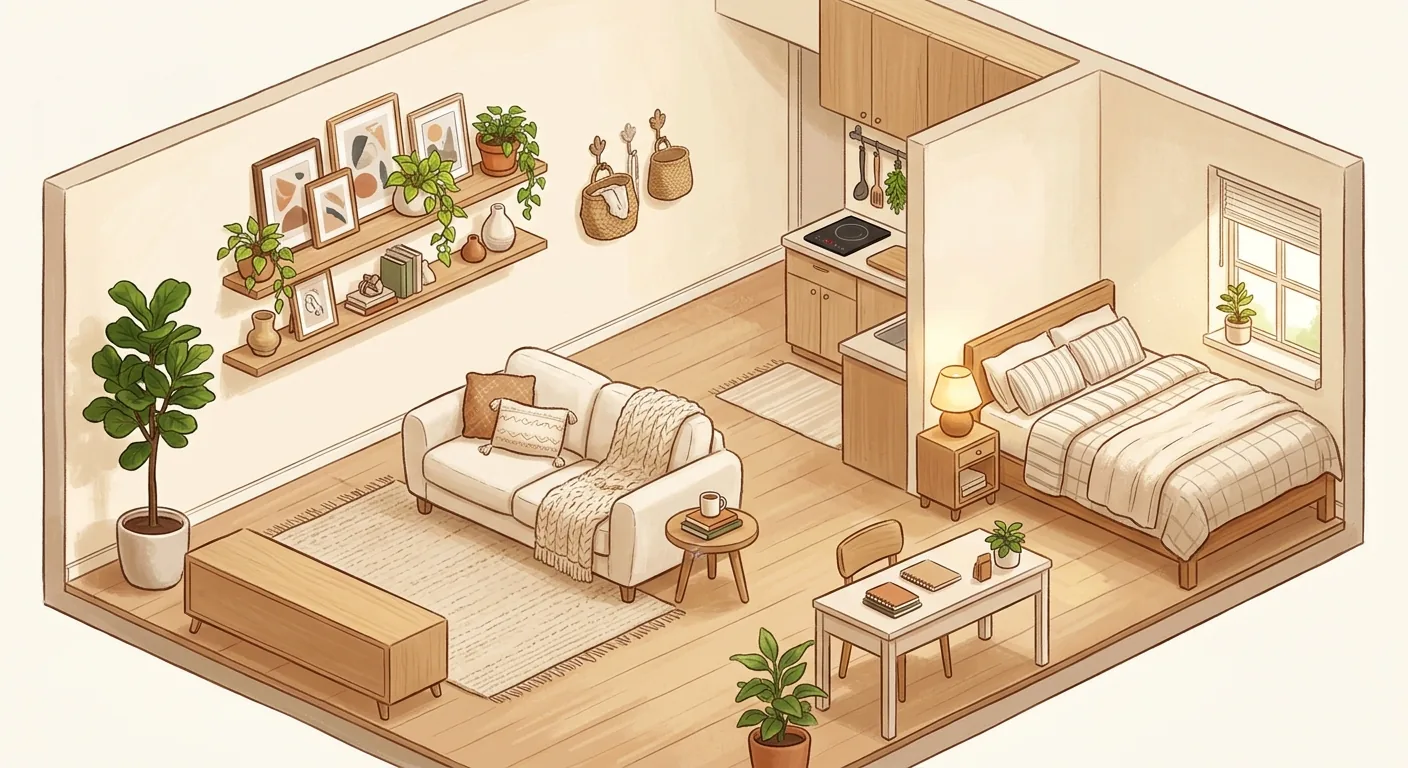
Caption: Get dimensions and traffic flow right first, then add style — even a 33 m² (roughly 10-ping) studio can feel comfortable to live in and go with you at move-out
7FAQ
What should I buy first for an unfurnished rental?
Buy "sleep" first, then "storage," with desk, chairs, and soft furnishings added last. A bed and mattress cover an eight-hour daily necessity — prioritize it; next comes the storage piece that determines whether your room stays tidy. Housing-related spending accounts for nearly 30% of household consumption in Taiwan (28.49% per the Taipei City DGBAS 2024 household survey), so with a limited budget, prioritize based on how often you'll use each item. Measure carefully and lay it out in a tool first before buying, to confirm it fits.
How should I set a rental styling budget?
Give priority to functional furniture you'll use daily and can take with you, with decorative soft furnishings coming last. Because renters already face inherently high housing costs (household consumption share around 28.49%, per the Taipei City DGBAS 2024 survey), your styling budget needs an upper limit even more, to avoid impulsive overspending. Set the budget cap first, prioritize by frequency of use, and add decor last — that's the least wasteful approach, with the detailed money-splitting method in the budget-conscious renter's money-saving guide.
How do I hang things and organize storage without drilling holes?
Use a "placement-based, not mounting-based" approach. Floor shelving, floor-to-ceiling tension rods, residue-free hooks, and peel-off wallpaper can all handle storage and display without a single hole drilled. Per Ministry of the Interior standard residential lease terms, tenants are generally required to restore the unit to its original condition upon return (Ministry of the Interior, 2025), and going drill-free is exactly what keeps that restoration cost at zero. The load capacity and residue-free performance of "no-trace" products should still be confirmed against the product specifications and real-world testing.
What should I keep in mind about restoring the unit when I move out?
The core is three things: don't damage the walls, don't leave adhesive residue, and be able to take all your furniture with you as a batch. Per Ministry of the Interior standard residential lease terms, a security deposit cannot exceed two months' rent, and tenants are generally required to restore the unit to its original condition upon return (Ministry of the Interior, 2025). As long as your styling stays fully reversible, peeling off adhesive items and moving out your furniture at move-out restores the original condition, and you get your full deposit back. Actual rights and obligations still follow your lease terms.
Do I really need to plan in a tool before buying furniture?
It's not required, but strongly recommended. Laying things out at true-to-scale sizing on screen first can dramatically reduce the hidden cost of buying the wrong size, things not fitting, and returns and exchanges. Our own experience is that after switching to plan-before-buy, our return rate dropped to nearly zero. The tool needs no installation and opens right in your browser — planning once first, at zero cost, is a much better deal than discovering a mistake only after moving furniture through the door.
8Related Reading
- Aisle Width and Traffic Flow Planning Guide: Kitchen, Dining Table, and Accessibility Clearances
- Complete Guide to Furniture Placement Simulation: Get the Placement Right First, Then Chase Looks
- Complete Guide to Small-Space Storage Planning: From Seasonal Storage to System Cabinet Traffic Flow
9References
- Directorate-General of Budget, Accounting and Statistics — National Overview: Housing Conditions and Quality of Life (2024)
- Taipei City DGBAS — Household Income and Expenditure Survey (2024)
- Ministry of the Interior Real Estate Information Platform (2025)
- Ministry of Education Department of Statistics (academic year 106)
- Ministry of the Interior Regulatory System — Standard Residential Lease Terms: Required and Prohibited Provisions (2025)